Reinhardt - Members Area Guide
( FP's Overwatch Strategy Guide )

Reinhardt's Enemy Vs Ally Ultimate Comparison
VIDEOS: Exact places where Reinhardt can Charge to get back to the fight faster after dying:
~ VIDEOS COMING SOON! ~
| Payload | Point Capture | Hybrid | Control |
|---|---|---|---|
| Dorado | Hanamura | Hollywood | Illios |
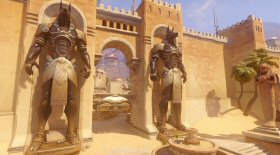
| Route 66 | Temple of Anubis | King's Row | Lijiang Tower |
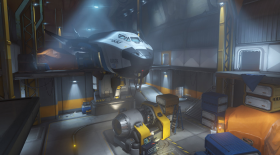
| Watchpoint Gibraltar | Volskaya Industries | Numbani | Nepal |
Reinhardt's Allied Synergies
Reinhardt's top support heroes:
1) Lucio: Reinhardt greatly benefits from both of Lucio's auras. Lucio's heal aura works great for keeping Reinhardt (and his team) healed up consistently throughout a match. Speed aura allows Reinhardt to move around much faster when his shield is out, and combined with Lucio's Amp it Up, Reinhardt can move very fast with his shield out. Lucio's auras allows Reinhardt to be more aggressive at charging enemies and getting up close to use his Rocket Hammer melee attacks. Keep in mind that Lucio's auras only work when you stay within 30 meters of each other and keep line of sight with him as well.
Lucio benefits from Reinhardt's shield by allowing him to safely stay behind it and spam his sonic projectiles at the enemy. Lucio can protect Reinhardt up close from deadly close range heroes such as Mei's freeze gun, McCree's Flashbangs and Reaper's shotguns by blowing them away from Reinhardt with his Soundwave ability.
Lucio's ultimate Sound Barrier provides Reinhardt and his team with powerful temporary shields which allows Reinhardt to have the opportunity to be more creative by lowering his Barrier Field (shield) and charging up close to his enemies to get some Rocket Hammer attacks off before it wears off. Using an Earthshatter at this time can prevent enemies from running away from the Sound Barrier.
2) Mercy: Reinhardt greatly benefits from Mercy's healing beam, and he is a prime candidate for Mercy's healing.
Mercy can safely get behind Reinhardt's shield to heal him when he needs it. Mercy Getting behind Reinhardt's shield can also allow her to fire at enemies with her Caduceus Blaster since healing Reinhardt while his shield is taking damage does nothing if he is at full health. Mercy's blaster is quite powerful and can be very effective against stationary targets like Bastion Sentries or Torbjorn Turrets.
Mercy's damage boosting can be effective with Reinhardt but only when he gets close to his enemies with his Rocket Hammer or immediately after launching a Fire Strike, otherwise there is no point in damage boosting him. Damage boosting Reinhardt before he does an Earthshatter will do 65 damage to all enemies instead of 50 to all enemies, which is not huge. Remember when Reinhardt has his shield out there is no point in Mercy damage boosting him as he is unable to attack with his shield deployed.
Mercy should be cautious when Reinhardt charges into the enemy, as he may do it in a dangerous place where Mercy may be very vulnerable at. In these cases Mercy may be better off just flying to a different ally to support.
Reinhardt is one of the most important heroes for Mercy to Resurrect. Even though Reinhardt can do a Charge to get back to the fight faster by a slight margin, Mercy's team will greatly benefit from having Reinhardt and his shield back in the action ASAP.
When Reinhardt uses an Earthshatter, enemies will drop to the ground. This can be a good opportunity for Ana to put one of those dropped enemies to sleep with a Sleep Dart before they get back up.
Reinhardt ranks high for a great candidate for Ana's Nano Boost. Reinhardt's Rocket Hammer is devastating in close range, Nano Boost allows Reinhardt to quickly get into close range to start hammering away at all his enemies with increased damage and protection at the same time. Nano Boost can also help Reinhardt position himself faster for a more efficient Earthshatter. Even when Reinhardt is Nano Boosted, Ana should definitely keep an eye out on him and give him Biotic heals as he needs it.
4) Zenyatta: Zenyatta's Harmony Orb can keep Reinhardt healed up in times when he needs it. Zenyatta should be constantly monitoring his allies health, especially Reinhardt's, and when an ally needs healed he should throw his Harmony Orb on that ally. Zenyatta needs to be constantly monitoring Reinhardt's health, because remember Reinhardt's shield can easily mitigate damage away from him and he can be topped off on health for long periods of time. This means Zenyatta should give the Harmony Orb to someone else that can take advantage of it while Reinhardt is fully healed. But keeping Reinhardt healed should be a prime concern for Zenyatta.
Zenyatta does a lot of damage with his energy orbs, but he is a very squishy support target for enemies to fire at. Reinhardt's shield enables him to safely dish out damage with his energy orbs while staying covered from snipers and other damage dealers.
When Reinhardt initiates a Charge at the enemy, he oftentimes charges into a bunch of other enemies and it can be dangerous for him. Zenyatta can give Reinhardt the Harmony Orb at this moment to help him survive after charging.
Be mindful of which enemy has received Zenyatta's Discord Orb and consider firing your Fire Strike at that target to do +50% more damage.
Zenyatta's ultimate Transcendence (rapid healing for all allies around him) can allow Reinhardt to lower his shield and concentrate on advancing towards the enemy by charging and then doing Rocket Hammer attacks on them. Using an Earthshatter at this time can prevent enemies from running away from the Transcendence.
5) Symmetra: Tanks don't benefit from Symmetra's Photon Shield as much as offensive heroes do, but Reinhardt does benefit from it a bit allowing him to withstand some more damage while his shield is down. Reinhardt frequently lowers his shield to fling Fire Strikes and he tends to take some quick bursts of damage during these times, Photon Shields will simply regenerate the damage up keeping his HP topped off more often. Reinhardt's shield works great for Symmetra, as it can allow her to safely fire her Photon Orbs at enemies more precisely.
Symmetra's Sentry Turrets can provide protection for Reinhardt by preventing flankers from reaching around through choke points to get behind Reinhardt's shield to do damage to him or allies behind him.
Even though Reinhardt can do a Charge to get back to the fight faster, he still greatly benefits from using Symmetra's Teleporter to get back to the fight a lot faster.
Reinhardt's Earthshatter can allow Symmetra to have easy targets to fire a Photon Orb at.
Reinhardt's top tank synergies:
1) Zarya: The ideal time for Reinhardt to receive Zarya's Projected Barriers is when he is charging towards a bunch of enemies or is up close attacking enemies with his Rocket Hammer. Reinhardt greatly benefits from Zarya's Projected Barriers during these times. Anytime Reinhardt is blocking attacks with his shield would be a waste of a Projected Barrier.
Reinhardt's shield allows Zarya to safely fire her Particle Cannon until her Personal Particle Barrier becomes available for her again.
Zarya's personal Particle Barrier can act as a shield for Reinhardt, allowing him to safely launch a Fire Strike if she is in front of him at the time (since Reinhardt has to lower his shield to launch a Fire Strike about every 6-8 seconds).
The best thing for Reinhardt to do when enemies are stuck in Zarya's ultimate Graviton Surge is to simply fire a Fire Strike at the clumped up enemies and to just shield their attacks so your allies can use their AOE attacks to take them out. Reinhardt can use an Earthshatter at the clumped up enemies to prevent them from countering it via means of shields, Ice Walls, healing and to prevent them from firing while stuck in the surge.
2) Roadhog: If Reinhardt is right next to Roadhog when he Chain Hooks an enemy into him, he can use his Rocket Hammer to knock the victim, preventing him from escaping.
Roadhog lacks means of damage mitigation and because of that he benefits a lot from Reinhardt's shield. This lets Roadhog concentrate on dishing out Scrap Gun damage and holding off on using his Take a Breather (self-heal) ability.
Roadhog can be very vulnerable while using his ultimate Whole Hog, but Reinhardt can step in with his shield to protect him during his ultimate.
An Earthshatter can allow Roadhog to safely step in and Chain Hook one of the dropped down victims.
Roadhog may not want to use Whole Hog against dropped enemies from Reinhardt's Earthshatter, as they will be knocked away, potentially giving your team a harder chance to counter the dropped enemies.
3) D.va: Getting behind Reinhardt's shield is only somewhat effective for D.va. Remember in order for D.va to do any serious damage, she needs to be up close to the enemy and most of the time Reinhardt's shield is simply to far away from the enemy. D.va can still do decent damage to big targets such as tanks from medium range, in which case Reinhardt's shield may work okay for D.va sometimes.
When Reinhardt charges towards a bunch of enemies, D.va can assist him by boosting after him to knock down any other enemies around him and then use Defense Matrix to help Reinhardt survive after charging.
D.va's ultimate Self-Destruct pairs very well with Reinhardt's ultimate Earthshatter. Earthshatter will drop and stun enemies to the ground, preventing them from running away from a Self-Destruct.
4) Winston: Winston has Barrier Projectors (shield globes) which have similar purposes to Reinhardt's shield. Although Winston plays differently than Reinhardt, Winston leaps around close up to his enemies and then puts out his shield globe while attacking enemies up close with his Tesla Cannon. This works good for Reinhardt when he charges towards a bunch of enemies, as Winston can then Leap after him and then put down a shield globe, protecting Reinhardt while he bashes enemies in with his Rocket Hammer.
While pushing forward in the frontlines, Winston can still use his shield globes to protect Reinhardt while he launches his Fire Strikes, recharges his shield and to allow Reinhardt to safely use his Rocket Hammer in close quarters.
Winston can follow up Reinhardt's Earthshatter by leaping at them and then throwing down a shield globe and attacking with his Tesla Cannon, but other than that there really isn't much synergistic use with Earthshatter and Winston's ultimate Primal Rage.
5) Reinhardt: Two Reinhardts? Well you will have double the shields, double the Fire Strikes, but your team will terribly lack the means to counter enemies that can get higher up, as one of Reinhardt's biggest weakness is lack of vertical mobility and attacks (besides the occasional Fire Strikes). Two Reinhardts can also be countered by Symmetra's Photon Orbs, as they can penetrate through shields.
Double the shields can be effective if you can space them out and not get countered by Photon Orbs, enemy Fire Strikes or from channeled weapons that can pierce through them.
If you use an Earthshatter, just make sure you space yours out with the other Reinhardt, as two Earthshatters at once will not be efficient. By spacing them apart, you will keep your enemy on the ground for a longer period of time.
Reinhardt also pairs well with:
1) Soldier 76: Out of all the tanks, Reinhardt will take the most benefit from Soldier 76's Biotic Fields. Reinhardt has no Shield HP, and has relatively poor mobility to reach health packs (besides Charge). Biotic Fields will dramatically help keep Reinhardt in the fight much longer.
Reinhardt's shield is especially useful for Soldier 76. Since Soldier 76 is typically not a flank/harass hero like other attackers are, he mostly stays right with his team and can dramatically benefit from staying behind Reinhardt's shield. Because Soldier 76 is mostly with Reinhardt, Biotic Fields will get a lot of use with Reinhardt as well.
Reinhardt's Earthshatter can let Soldier 76 use Tactical Visor more safely, since the knocked down victims will be unable to attack for a few seconds. Even getting behind Reinhardt's shield is another way for Soldier 76 to safely use Tactical Visor.
2) Torbjorn: Reinhardt's shield pairs very well with Torbjorn. Torbjorn and his turret can safely attack enemies from behind Reinhardt's shield. Shielding a turret will enable Torbjorn to focus on using his Rivet Gun more instead of constantly repairing his turret. Reinhardt's shield can also enable Torbjorn to run around safely to pickup Scrap.
Out of all the tanks, I believe that Reinhardt benefits the most from Torbjorn's Armor Packs. Reinhardt is overall a very vulnerable hero without the help from his allies to provide healing or protection in some way. Armor Packs increases his survivability, especially when charging around at enemies exposing himself to more danger.
Reinhardt's Earthshatter will drop/stun enemies to the ground for a short time giving Torbjorn an easy opportunity to dish out Rivet Gun damage and further protecting his turret from taking damage as well. If there was a lot of enemies dropped from the Earthshatter and Torbjorn's turret is able to fire at them, he should consider using Molten Core at that time to take out the rest of the enemies.
3) Mei: Reinhardt's shield can allow Mei to safely get behind and freeze enemies up close or shoot Icicles from afar without worrying about using Cryo-Freeze to save her as much.
In close range both Mei and Reinhardt can make a devastating team. Reinhardt's Rocket Hammer can knock down multiple enemies while Mei freezes them. This combo can make it incredibly hard to escape out of. On top of this Mei can use Ice Walls to prevent enemies from escaping.
Reinhardt's ultimate Earthshatter is another great way to drop/stun enemies, preventing them from escaping Mei's frost stream or Blizzard.
4) McCree: Reinhardt's shield is extremely valuable to McCree. McCree can safely dish out plenty of DPS behind Reinhardt's shield and he easily has Reinhardt's back with his Flashbang and Fan Fire combo. With Reinhardt's shield, McCree can take on enemies that he normally would be countered by, such as: a Bastion Sentry, Widowmaker, Torbjorn and his turret.
If McCree gets too bombarded with enemies up close, Reinhardt's Rocket Hammer melee swings can knock them all down, giving McCree an easy chance to do some Fan Fire attacks to finish them off.
Reinhardt's Earthshatter is a safe time for McCree to use his ultimate Deadeye against all the knocked down enemies.
5) Hanzo: Reinhardt's shield is extremely valuable to Hanzo. Hanzo can safely stay out in the open and dish out plenty of DPS behind Reinhardt's shield. Since Hanzo is not an offensive flanker, he is usually in a position to take advantage of Reinhardt's shield.
Hanzo's Sonic Arrow can allow Reinhardt to launch a Fire Strike before an enemy comes around a wall/corner, potentially getting an easy hit on an enemy. Sonic Arrow can also allow Reinhardt to start doing a Charge even before an enemy comes within view.
Earthshatter can pair well with Hanzo's ultimate Dragonstrike, as the knocked down victims from an Earthshatter will be unable to run away from the Dragonstrike.
Sometimes Hanzo's Dragonstrike can give Reinhardt a good opportunity to Charge at one of the fleeing enemies.
6) Bastion: Reinhardt's shield can be extremely useful in front of a Bastion Sentry. This can dramatically keep Bastion alive more often allowing him to dish out continuous damage without worrying about using his Self-Heal as much. This combo is also very powerful when used on top of a moving Payload.
Reinhardt's shield allows Bastion in Recon Mode to safely reposition elsewhere. Bastion's ultimate Tank Form also can be protected very well by Reinhardt's massive shield.
Reinhardt's Earthshatter drops enemies to the ground stunning them, which allows Bastion to have easy targets to shoot at. Bastion's Tank Form is also good when paired with Earthshatter, which can easily keep Bastion alive during his ultimate.
Up close and Reinhardt can protect Bastion against flankers with his deadly Rocket Hammer. Reinhardt's hammer knocks enemies down, which can give Bastion time to shoot at the flankers to finish them off.
7) Widowmaker: Reinhardt's shield can be valuable to Widowmaker. Widowmaker can safely stay out in the open and dish out plenty of DPS behind Reinhardt's shield. Although Widowmaker tends to snipe from random perches and ledges and a lot of the time she is not near Reinhardt to take advantage of his shield. But if Widowmaker is on your team, she should consider sticking around you a bit more if she can to take advantage of your shield occasionally.
Widowmaker's Infra-Sight can allow Reinhardt to launch a Fire Strike before an enemy comes around a wall/corner, potentially getting an easy hit on an enemy. Infra-Sight can also allow Reinhardt to start doing a Charge even before an enemy comes within view.
Reinhardt's Earthshatter can give Widowmaker easy sniping shots at the dropped/stunned enemies.
8) Junkrat: Reinhardt's shield is very useful for Junkrat to stay behind to take cover and safely fire his grenades from. Junkrat still needs to watch his back from flankers such as Tracer, Reaper and Genji. Junkrat can put a Steel Trap behind him in this situation to help keep you and Junkrat alive from flankers creeping up on you.
Enemies trapped in a Steel Trap is an easy target for Reinhardt to Charge at, or launch a Fire Strike at. When Reinhardt charges towards the enemy, Junkrat can start spamming his grenades at your location to help keep you alive from other enemies in the area.
Earthshatter pairs well with Junkrat's ultimate Rip-Tire. Earthshatter will drop enemies to the ground and stun them for a few seconds. This gives Rip-Tire an easy chance to survive and prevents enemies from running away from Rip-Tire's explosion. While Junkrat initiates Rip-Tire, Reinhardt can guard Junkrat with his Rocket Hammer melee swings, Charge ability or shield.
Reinhardt's neutral synergies:
1) Reaper: Reinhardt's shield is not usually useful with Reaper due to the fact that Reaper mostly roams around on his own and is usually not near Reinhardt to take advantage of your shield. However, in certain circumstances, such as a push, Reaper can still get behind Reinhardt's shield for protection while he dishes out strong DPS with his shotguns.
Another instance where Reinhardt's shield comes in great use with Reaper is after Reinhardt uses a Charge. Normally it can be very risky for Reinhardt to Charge his enemy due to being in a bad situation afterwards. With Reaper's nature of being behind enemy lines, he is usually already there to have Reinhardt's back after charging. With this in mind, both Reaper and Reinhardt should be aware where each other is at to plan successful Charges. Reaper can also Shadow Step to Reinhardt after charging to be there to get behind his shield to dish out shotgun damage.
Reinhardt's Earthshatter can allow Reaper to safely use Deathblossom to finish off the knocked down victims.
2) Pharah: Similar to Winston, Reinhardt can also provide Pharah with a shield to get behind, but only from the ground. From there, Pharah can safely fire rockets and use Barrage behind Reinhardt's shield. Another safe time for Pharah to use Barrage is right after Reinhardt uses his ultimate Earthshatter to knock down a bunch of enemies, this can give Pharah a few seconds to safely use Barrage before they get back up.
Pharah can deal with some of Reinhardt's worst enemies, such as Symmetra's Photon Orbs against his shield and Junkrat's Grenade spam.
After Reinhardt charges at an enemy, he may be in a bad situation with many enemies surrounding him. Pharah can help him survive by using a Concussive Blast to knock back enemies around him, giving Reinhardt some time to escape and get his shield out.
3) Genji: Reinhardt's shield is not very useful with Genji due to the fact that Genji mostly roams around on his own and is usually not near Reinhardt to take advantage of his shield.
Reinhardt's Earthshatter can allow Genji to safely use his ultimate Dragonblade to finish off the knocked down victims.
4) Tracer: Reinhardt's shield is not very useful with Tracer due to the fact that Tracer mostly roams around on her own and is usually not near Reinhardt to take advantage of his shield.
Reinhardt's Earthshatter can allow Tracer to safely use a Pulse Bomb to finish off the knocked down victims.
Free Guides Menu:
News/Home | Blog | Follow | Unlock Full Guide
Overwatch Hero Introductions - Basics Guide
How the Mechanics Work in Overwatch
How Headshots Work In Overwatch
Overwatch Game Modes Overview
Overwatch Health Types & Hitpoint Basics
Overwatch Terms, Abbreviations, & Their Meanings
Easiest and Hardest Overwatch Heroes to Master
My Hotkey
Bindings For Overwatch & Why I Use Them
|
Feel free to leave any type of comment, such as how you like the guide and if it helps you at all, or to report something that is inaccurate in the guide. |


 Sombra
 Temple of Anubis
 Hanamura
 Watchpoint Gibraltar
