
Ana In-depth Strategy Guide
( FP's Overwatch Strategy Guide )
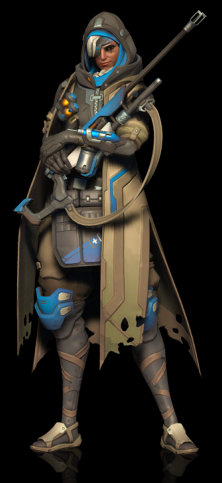 Coming out of Cairo, Egypt, Ana is the mother of Pharah who is an elite
sniper specializing in supporting allies and damaging enemies from a
distance with her Biotic Rifle and grenades. Ana brings a lot of
game changing abilities to Overwatch. Ana's Rifle can be shot at
allies to heal them or at enemies to damage them. Ana's play style
involves taking cover as much as possible while having her allies in
view to heal them with her biotic rifle or grenades.
Coming out of Cairo, Egypt, Ana is the mother of Pharah who is an elite
sniper specializing in supporting allies and damaging enemies from a
distance with her Biotic Rifle and grenades. Ana brings a lot of
game changing abilities to Overwatch. Ana's Rifle can be shot at
allies to heal them or at enemies to damage them. Ana's play style
involves taking cover as much as possible while having her allies in
view to heal them with her biotic rifle or grenades.
Ana's grenades not only heal allies or damage enemies but it also alters healing effects for all players. Allies struck with a Biotic Grenade will have double the healing effects while enemies will receive no healing benefits from all potential sources. Ana can even throw her Biotic Grenade at the ground near her to receive the benefits as well.
Ana brings some game changing utility to the table with her Sleep Darts. Being able to fire Sleep Darts at her enemies can disable them from combat for a short period of time. This provides great crowd control and also serves as a way to protect herself from close one on one encounters or deadly enemy ultimates.
Ana's ultimate Nano Boost turns one of her allies into a killing machine for a short period of time, giving them faster attack rate and damage mitigation. This can be very deadly when combined with certain allied heroes and their ultimates.
Ana's weakness is her lack of mobility and she can be prone to offensive flankers like Genji, Tracer and Reaper. Even though Ana can use a Sleep Dart on these heroes to disable them for a short period of time, it can be difficult to aim Sleep Darts at these fast moving offensive heroes.
Name: Ana Amari
Difficulty: Hard
Role: Support
Age: 60
Occupation: Bounty Hunter
Base of Operation: Cairo, Egypt
Release Date: COMING SOON!
(Available now on PTR Realm)
Ana
|
 |
Main attacking weapon Ana's rifle shoots darts that can restore health to her allies or deal ongoing damage to her enemies. She can use the rifle's scope to zoom in on targets and make highly accurate shots. Ammo: 10Damage Enemy: 60 per shot Heals Ally: 75 per shot Fire Rate: 1.2 rps Reload Time: 1.5 sec Headshot?: no Default Hotkey: LM Scoped Mode Default Hotkey: RM |
Ana's Biotic Rifle serves two main purposes: To heal her allies and to damage her enemies by simply shooting either one.
Biotic Rifle Mechanics
- One shot to an enemy does 60 damage over one second.
- One shot to an ally does 75 healing over one second.
- When shooting an ally, you will see a visual cloud over the ally along with an audio beep as well.
- Ana can fire one round every 0.8 seconds, so effectively she can heal 90 per second if she lands all shots on allies that need healed, or deal 96 damage per second against enemies if all shots were landed.
- There is no fall-off distance damage.
- Both scoped and unscoped shots will share the same target hitbox sizes.
- Unscoped shots fire fast moving projectiles that have no arks.
- Scoped shots share the same ammo pool, firing rate and damage as unscoped but scoped shots fire hitscan bullets (no travel time). Hitscan bullets is one of the main benefits of scoped shots. Because of this, scoped shots are great for long range firing.
- There are no headshots with the Biotic Rifle. Focusing on aiming at body shots to heal allies or damage enemies makes things a bit easier.
- Allies will have bigger hitboxes than enemies by about 50%. This makes shooting at allies a much easier target than enemies. This should also effect your decision to shoot at allies more often than enemies.
Ability with cooldown Ana fires a dart from her sidearm, rendering an enemy unconscious (though any damage will rouse them). Cast Time: .25 secondsDuration: 5 seconds Damage: 5 Cooldown: 12 seconds Headshot?: no Default Hotkey: Shift |

Ana's utility weapon, Sleep Darts, provides a great way to disable an individual enemy from battle. Sleep Darts serves multiple uses, the main ones include: crowd control, stopping enemy ultimates, and providing Ana with an escape mechanism.
Sleep Dart Mechanics
- Sleep Darts can damage things that are constructed.
- Zenyatta is immune to Sleep Darts while having Transcendence on, but your still able to put other enemies to sleep under the Transcendence.
- Shields, barriers and D.va's Defense Matrix will block Sleep Darts.
Crowd Control
Disabling an enemy from combat with a Sleep Dart can make things much easier for
your team. Although one of the main issue with putting an enemy to sleep
is that your allies will be tempted to fire at the sleeping target, which will
wake the enemy. It is usually good practice to let your allies know which
enemy you put to sleep and possibly where that enemy is at.
Stopping Enemy Ultimates
One of the greatest advantages of Sleep Darts is being able to put an end to an
enemy ultimate. This can have a huge impact on the game.
Easy (and important) Ultimate Targets for Sleep Darts
The following enemy ultimates are not only very important to stop by they are also easy to aim Sleep Darts at since the hero becomes either stationary or moves extremely slow while using their ultimate. Also, a Sleep Dart will put an actual end to these ultimates.
- McCree's Deadeye
- Pharah's Barrage
- Reaper's Deathblossom
- Roadhog's Whole Hog
Other (less important) Hard to Aim Ultimate Targets
Please note that not only are the ultimates below going to be harder to aim at, if one of your allies attacks the sleeping target, the ultimate will continue when he/she awakens.
- Winston's Primal Rage (Although Primal Rage's big hitbox can make aiming Sleep Darts a bit easier)
- Genji's Dragonblade
- Soldier 76's Tactical Visor
- Bastion's Tank Form
- Torbjorn's Molten Core
- Ana's Nano Boosted Ally
Please note that Lucio's ultimate Sound Barrier is a good counter to Ana's Sleep Dart as it will cancel out any enemy that is sleeping from a Sleep Dart.
Ana's Escape Mechanism
Ana's main weakness overall his her lack of mobility, which can make it hard to
run away from offensive flankers. But Sleep Darts provides a nice solution
to this problem. When being flanked by offensive heroes such as Tracer,
Genji and Reaper the best thing you can do to these heroes is to fire a well aim
Sleep Dart at them to allow yourself to run away from them before they do any
damage to you.
Hard To Aim
One of the main issues with Sleep Darts is that they can be very difficult to
aim, especially at targets from a long distance or at fast moving targets up
close. Even though Sleep Darts have no ark and travel somewhat quickly,
Ana has a .25 second cast time which contributes to the difficult process of
aiming them. Being able to use this ability only once every 12 seconds
means you could be "wasting" a lot of its potential if you keep
missing targets. With this in mind you
should consider saving Sleep Darts for when you know you will have a higher
chance of landing it successfully on a target. Some of this will come with
practice, but here are some tips on letting you know which targets are easier to
aim at.
Easy Targets to Aim Sleep Darts At
- Heroes with big hitboxes such as: D.va, Reinhardt, Roadhog and Winston.
- D.va when she is firing her Fusion Cannons (she moves extremely slow when firing).
- A stationary Bastion Sentry, easy hit and a very important target as well.
- Slow moving enemy ultimates such as: Pharah's Barrage and McCree's Deadeye (these should be high priority targets as well).
- Enemies in a hallway or tightly confined spaces will make aiming Sleep Darts easy since the enemy will have little room to dodge them.
- Places where the enemy is highly prone to travel to. Sometimes simply spamming a Sleep Dart from long distance will be your only option for the time being, knowing which spots to spam at can make things easier. I might make video guides on these spots later.
Ability with cooldown Ana tosses a biotic bomb that deals damage to enemies and heals allies in a small area of effect. Affected allies briefly receive increased healing from all sources, while enemies caught in the blast cannot be healed for a few moments.
Cooldown: 10 seconds |
Ana's Biotic Grenades have similarities to her Biotic Rifle, in which it has the capabilities to heal allies and damage enemies in a small blast radius, but where things differ is in its healing effects for both enemies and allies. Biotic Grenades will double all healing effects to allies and will prevent all healing on enemies for its duration for those struck in the blast radius.
When a hero gets struck by Ana's Biotic Grenade, their health bar will look like this:(receives double healing)

(receives NO healing)

Other Mechanics of Biotic Grenade
- Biotic Grenade flies fairly far with an ark.
- If thrown very far (especially up into the air) it will eventually explode before hitting something.
- Biotic Grenades do damage to things that are constructed, including: Junkrat's Traps/Mines/Rip-Tire, Symmetra's Sentry Turret/Teleporter, Torbjorn's Turret.
- Enemy shield HP will still be able to regenerate while under the influence of a Biotic Grenade.
Let's explore the potential of this ability by examining the healing effects from various allies and how much it will be increased by with a Biotic Grenade.
Biotic Grenade's Healing Potential
- Ana's Biotic Rifle: Normally 75hp per shot. This increases to 150hp per shot with a Biotic Grenade!
- Mercy's Caduceus Staff: Normally 50hp per second (only one ally at a time). This increases to 100hp per second with a Biotic Grenade!
- Soldier 76's Biotic Field: Normally 35hp per second (for all allies standing in the field). This increases to 70hp per second with Biotic Grenade!
- Lucio's Crossfade Healing Aura: Normally 15.6 hp per second (for all allies within 30 meters of Lucio's line of sight). This increases to 24hp per second with Biotic Grenade!
- Lucio's Amp It Up with Crossfade Healing: Normally 51 hp per second for 3 seconds (once every 12 seconds). This increases to 80hp per second with Biotic Grenade!
- Zenyatta's Harmony Orb: Normally 30hp per second (only one ally at a time). This increases to 60hp per second with Biotic Grenade!
- Zenyatta's Ultimate Transcendence: Normally 300hp per second. This increases to 600hp per second with Biotic Grenade!
And also keep in mind all these healing sources will become zero when used against enemy healers!
Biotic Grenade Tips Against Enemy Healers
Knowing when to use a Biotic Grenade against enemy healers is very important and here is a top list of the most important ones to look out for:
- Zenyatta's Ultimate Transcendence - When you see an enemy Zenyatta using his ultimate throw a Biotic Grenade right on enemies around him to prevent all of his healing for his allies within the blast radius of the Biotic Grenade. Keep in mind that Zenyatta is immune to the Biotic Grenade himself while under Transcendence.
- Soldier 76's Biotic Field - Biotic Fields are stationary and makes for an easy Target for Biotic Grenades. Simply throw a Biotic Grenade at enemies standing in the Biotic Field to disable its healing effects.
- Allies Around Lucio - Throwing a Biotic Grenade at enemies near Lucio and his heal aura will prevent all his healing for a short while (especially when he uses Amp It Up).
- Mercy's Caduceus Staff - See an enemy Mercy healing an ally who needs healed? Simply throw a Biotic Grenade on that enemy that Mercy is healing to prevent all of Mercy's healing for Biotic Grenade's duration.
- Zenyatta's Harmony Orb - See an enemy trying to flank your team with the Harmony Orb on him? Simply throw a Biotic Grenade on that enemy to disable the healing effects of the Harmony Orb on him.
Ana's Own Healing Source
One of the main benefits of Biotic Grenades is that Ana can use it to heal
herself by throwing it at the ground or a surface near her. This comes in
handy for many situations, especially when dealing with flankers. When you
have to deal with close up enemy flankers such as Tracer, Reaper and Genji,
aiming a Biotic Grenade at them so it also hits you as well will damage them by
60 and heal you with 100, this will have a huge impact for one on one fights.
You can even combo this by using a Sleep Dart to increase your chance of
surviving close up one vs one fights.
Communication
Biotic Grenades have very strong capabilities to heal allies, but one of the
main issues with Biotic Grenades is its small blast radius, which can make
healing allies with it a tough task. Its wise to actually have a strategy
with your team to have a vocal warning ahead of time that you will be throwing
out a Biotic Grenade with the purpose of healing allies. With this
strategic announcement, allies will know to move to a central spot to receive
its healing benefits. This spot can be your team's tank, or a specific ally
mentioned during your announcement. For example you can say this to your
allies: "Throwing a Biotic Grenade at Reinhardt in 3 seconds".
|
ULTIMATE |
Ultimate Ability After Ana hits one of her allies with a nano boost, they temporarily deal more damage, and take less damage from enemies' attacks.
Duration: 8 seconds |
Ana's ultimate turns one of her allies into a killing machine for 8 seconds by the use of nano bots. Nano Boost will increase the damage output and damage reduction of the ally that receives it.
Knowing If you Have Been Nano Boosted
If you have been Nano Boosted by Ana, you will see a bluish hue across
the edges of your screen along with lightning flares coming from the edges as
well. Your arms and weapon will sport electricity flowing through them and
you will hear a constant electric sound for the entire duration of the ultimate.
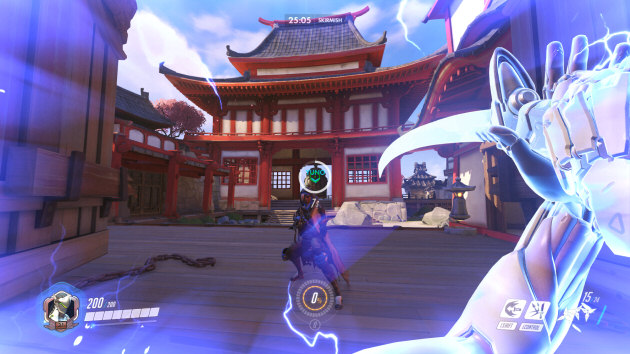
Players will look like this in-game:
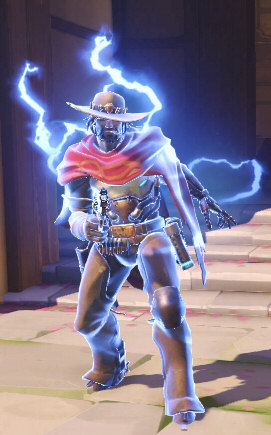
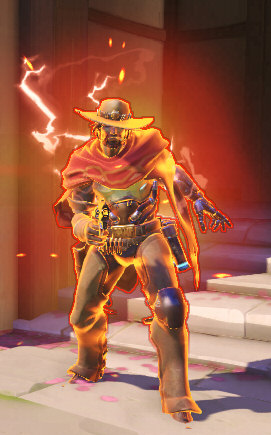
NOTE: Enemies will have reddish orange lightning instead.
Allied Ultimates that benefit the most from Nano Boost
- Genji's Dragonblade Nano Boosted is a very powerful synergy. Normally Genji is vulnerable while using his ultimate but with increased damage reduction he has little to worry about and will be able to attack enemies much more effectively while Nano Boosted.
- Soldier 76's Tactical Visor Nano Boosted will make him a harder target to take down and the aim bot of Tactical Visor will be extremely deadly.
- Reaper's Death Blossom is already very powerful, but when Nano Boosted he will be able to survive better if he gets targeted by a lot of enemies and take down enemies much faster.
- Bastion's Tank Form Nano Boosted is one scary tank, being able to deal more damage and withstand more damage makes Nano Boosting Bastion's Tank Form very effective.
- Torbjorn's Molten Core Nano Boosted turns Torbjorn into one scary dwarf. Even though his turret will be unaffected by the Nano Boost, Torbjorn himself will be able to do a lot of DPS while being practically invulnerable for Nano Boost's duration.
- Hanzo's Dragonstrike does a damage over time effect and with Nano Boost it will simply do more DPS ensuring the death of Hanzo's victims more effectively.
- McCree's Deadeye becomes stronger, making it quicker for McCree to line up kill shots, which in turn makes it safer for him to use it.
- Roadhog's Whole Hog Nano Boosted allows him to be at ease knowing he will be able to get more use out of his ultimate and less chance of death since he cannot cancel his ultimate while in use. Whole Hog does not do a ton of damage normally, but with Nano Boost, Whole Hog becomes more viable as a damage dealer as well.
- Pharah's Barrage is normally very deadly, but she is also very vulnerable while using it. When Nano Boosted she can withstand more damage while casting Barrage while also ensuring enemies will die quicker as well, thus increasing the chance of her survival while Barraging.
Overall Best Candidates For Nano Boost
Ultimates aside, here is a rough list of the best allies to Nano Boost:
- Reaper - Nano Boost tends to be very valuable for allies who excel at doing extreme damage in close range, and Reaper is right up there at the top with that.
- McCree - Nano Boost allows McCree to position himself safer for more unpredictable Flash Bang throws. Along with the increased damage output of his revolver and damage reduction makes McCree an excellent choice for Nano Boost.
- Zarya - Zarya can be very beneficial to Nano Boost, especially if her Particle Gun is already charged up. Zarya will greatly benefit from all aspects of Nano Boost making her one tough beast to take down.
- Reinhardt - Reinhardt's Rocket Hammer is devastating in close range, Nano Boost allows Reinhardt to safely get into close range to start hammering away at all his enemies with increased damage and protection at the same time.
- Pharah - Increased rocket damage and reduced damage while Pharah is flying around makes Nano Boosting Pharah a great option.
- Bastion - The increased damage output and damage reduction from Nano Boost can make Bastion a much more powerful defense.
- Tracer - Nano Boost makes Tracer's nature of being pesky much more peskier. With the increased damage reduction she will be incredibly hard to take down. The increased damage output will allow her to do her flanking duties much more effectively. Nano Boost also increases Pulse Bomb damage, which can be used on high HP heroes such as tanks to ensure the death of them.
- Roadhog - Nano Boost allows Roadhog to safely move around to line up Chain Hook throws more efficiently. The increased damage reduction and damage output allows him to be much more aggressive at doing basically what ever he wants to do without too much worry.
- Soldier 76 - Nano Boost makes Soldier 76 a more overall effective damage dealer and a harder target to take down thanks to the increased damage reduction.
- Junkrat - The extra damage output and damage reduction turns Junkrat into a wild killing machine if put into the right hands. Keep in mind there is no point in Nano Boosting Junkrat if he is going to use his ultimate Rip-Tire, as it has no effect on it.
- Hanzo - Giving a highly skilled Hanzo player Nano Boost can be extremely deadly.
- Torbjorn - Nano Boosting Torbjorn allows him to safely move into the front lines to pick up Scrap while also dishing out more damage as well. If he decides to use his ultimate Molten Core with it he will get a lot more use out of it.
- Genji - If put into the right hands, a Nano Boosted Genji can be devastating. Overall Genji's DPS is a tad on the weaker side, but with Nano Boost he can do his flanking duties much more effectively while being able to not take as much damage. And remember, Genji will get a lot of use out of Nano Boost with his ultimate Dragonblade.
- Winston - A Nano Boosted Winston will be annoying to deal with as he will be able to easily catch up to his enemies faster thanks to the increased speed of Nano Boost and will be able to soak up much more damage, providing his role of a tank much more effectively.
- Mei - Mei's short range frost stream is a tad on the weaker DPS side and her purpose is to freeze enemies and then let her allies take the frozen enemies out. Even though her frost stream will do a bit more damage with Nano Boost, it won't freeze enemies any faster, so her frost stream does not benefit a whole lot from Nano Boost. However, the increased damage reduction allows her to move up close to her enemies safer to make her a harder target to take down, allowing her to possibly freeze more enemies.
- D.va - The increased damage reduction and damage output can allow her to safely stay in the front lines to soak up damage and kill enemies up close with her Fusion Cannons more effectively. Nano Boost has no effect on D.va's ultimate Self-Destruct and D.va will lose Nano Boost if she activates her ultimate.
- Zenyatta - In general, Nano Boosting other support heroes tends to be inefficient due to the reduced damage output of support heroes in general and their main roles are to heal anyways and Nano Boost does not increase healing. But Zenyatta has the highest DPS out of all the support heroes and can take better advantage of Nano Boost's increased damage output. The extra damage reduction only makes him more effective at throwing his orbs around and absorbing extra damage. Nano Boosting Zenyatta's Transcendence is virtually pointless and will be a waste.
- Widowmaker - Nano Boosting Widowmaker is low on the list, mostly because as a backline sniper she does not take too much advantage of increased the damage reduction, but the increased damage output of Nano Boost can make Widowmaker very deadly.
- Symmetra - Nano Boosting Symmetra is usually a poor choice, but it can allow her to move into the front lines more efficiently to deal damage with her short range Projector Beam, which will allow her to rev up her ultimate Teleporter faster in return.
- Lucio - The main drawback of Nano Boosting Lucio is his lack of DPS and you will most likely have better choices of allies to Nano Boost that does much more damage.
- Ana - There is virtually no point in Nano Boosting another Ana, as her DPS is very poor and she has no reason to move in the front lines to do any harassing anyways. Nano Boost also does not increase the healing rate of Ana's abilities.
- Mercy - Since Mercy spends most of her time healing allies she would be a poor choice to Nano Boost. Although the increased damage reduction of Nano Boost can allow her to survive a bit longer.
Ana's Strength and Weaknesses Vs Other Heroes

Zenyatta: Zenyatta's slow movement and poor mobility makes sniping him fairly easy for Ana. Sniping Zenyatta from a distance will also help keep you safe if he decides to throw his Discord Orb on you. If he does, simply go behind a wall real quick to shake it off. Unfortunately, Biotic Grenades or Nano Boost does not remove the Discord Orb from an ally.
Sleep Darts can be effective against Zenyatta but it can be hard to aim at him if he is a long distance away. Also, keep in mind that putting Zenyatta to sleep does not remove his orbs as they will still remain active while he sleeps.
An enemy with Zenyatta's Harmony Orb on will be a great target for Ana's Biotic Grenades, as the prevention of healing will make the Harmony Orb useless for a few seconds on that enemy.
Biotic Grenades are also a good counter to Zenyatta's ultimate Transcendence. Simply throw a Biotic Grenade at enemies within Transcendence's radius and they will not receive the healing benefits from the Transcendence. Keep in mind that Zenyatta himself is immune to everything (except knock backs) while using Transcendence, so Biotic Grenades or Sleep Darts will have no effect on him during that time.

Bastion: Ana has strong capabilities against Bastion. Since Ana snipes from a distance she is virtually safe from Bastion's strong DPS Sentry gun. The most potent thing Ana can do against a Bastion Sentry is to simply fire a Sleep Dart at him to disable him from combat for a short period of time, and this can have a huge impact on the game and can let your other allies (especially flankers like Tracer, Reaper and Genji) make their moves to get closer to Bastion to finish him off. Putting a Bastion Sentry to sleep will also put him out of Sentry mode when he awakens.
Another strong ability against Bastion is to prevent him from using his Self-Repair (heal ability) by throwing a Biotic Grenade at him. A good combo against him is to fire a few sniper shots at him and before he turns to shoot you launch your Biotic Grenade at him and then take cover, he won't be able to heal up for a short while and you or your allies will have an easier chance to finish him off afterwards.
A Nano Boosted ally will also be able to make easier work of a Bastion Sentry by allowing the ally to take less damage and then be able to kill him quicker with the increased damage output.
Bastion's Tank Form can be hard to deal with for Ana. As long as he is moving around erratically it will be hard to aim a Sleep Dart at him, and if you manage to land a Sleep Dart on him while in Tank Form and another ally shoots him, he will awaken while still being in Tank Form as long as the cooldown didn't end for it. Another tactic against Tank Form is to throw a Biotic Grenade at him to ensure he will not receive healing during his ultimate, increasing the chance of his death. If you see an ally close to Bastion's Tank Form at the time, giving that ally a Nano Boost can help him survive it along with the capabilities of taking Tank Form out easier.

Lucio: Ana's Biotic Grenades are a huge threat to Lucio and his heal aura. When used, Biotic Grenades will prevent all healing on Lucio's allies struck by the grenade and Lucio himself as well. The best time to use a Biotic Grenade against Lucio's team is right when he uses his Amp It Up ability. This will totally disable any rapid healing amongst any enemy struck by the grenade. The main way for Lucio to counter a Biotic Grenade is to switch to speed aura to allow any severely injured allies to run away for cover instead. Please note that Biotic Grenades have no effect against Lucio's ultimate Sound Barrier. Also throwing a Biotic Grenade on Lucio but not other allies will still allow his allies to receive the heal aura.
Sleep Darts are not too useful against Lucio. Sleep Darts are generally difficult to aim at Lucio and his overall fast movement. Even if you do hit him with a Sleep Dart, his auras will still be active on himself and his team. If you hit one of Lucio's teammates with a Sleep Dart he can activate his ultimate Sound Barrier to awaken the sleeping ally.
Lucio's Sound Barrier is a good counter to Ana's Nano Boost. A Nano Boosted Ally will have virtually no hope of killing someone with a Sound Barrier protection on them. Although Nano Boost lasts a few seconds longer than Sound Barrier, so it wont totally go to waste. Also Biotic Grenades do NOT prevent Sound Barriers.

Roadhog: Out of all the tanks, Roadhog is the easiest one for Ana to deal with. Since Roadhog has a self-heal (Take A Breather), Ana can use her Biotic Grenades on him to prevent him from using it for a short period of time, this can easily mean the death for Roadhog in many situations.
Roadhog's large hitbox makes hitting him fairly easy with the Biotic Rifle and especially Sleep Darts. Putting Roadhog to sleep is very beneficial as it will keep his deadly Chain Hook away from your team for a short while along with his insane close up Scrap Gun DPS.
Since Ana is a Sniper, she is generally far away enough from Roadhog to avoid his Chain Hook, but if you do get Chained in by Roadhog you will most likely die, but if Sleep Dart is available that is your best bet at escaping from him. You can also save an ally being chained in by Roadhog by giving them a Nano Boost. Just make sure that ally has enough health to begin with or Roadhog can still kill him quickly. A Nano Boosted ally in general can make easy work of Roadhog and will be able to deal with all his abilities more effectively.
Roadhog's ultimate Whole Hog can easily be countered by a Sleep Dart. Whole Hog is also one of the few ultimates that will actually end for good if you put him to sleep while he uses his ultimate.

Mercy: Mercy is another strong healer that can be countered by Ana's Biotic Grenades. See Mercy healing their main tank? Simply lob a Biotic Grenade on that enemy tank to disable him/her from getting healed for a short period of time. Biotic Grenades will also prevent Mercy's auto health regeneration as well. However, when you strike enemies with a Biotic Grenade, Mercy is still able to damage boost these heroes.
Hitting Mercy with a Sleep Dart will rarely happen. Mercy has a relatively small hitbox and she will usually be too far away from you, plus her Guardian Angel ability makes her move faster, which will only make her a harder target to aim at.
Nano Boosting an ally, especially a flanker such as Tracer, Reaper, Genji or D.va will make it easier for that ally to flank Mercy.

Winston: Winston will give Ana a hard time due to his ability to block Biotic Rifle shots, Sleep Darts and Biotic Grenades with his Barrier Projector. This can help protect his allies against all of your attacks and can increase their healing potential by blocking Biotic Grenades.
Winston also excels at flanking Ana quickly by leaping up close and taking you on with his Tesla Cannon. A well aimed Sleep Dart is your best hope at surviving his wild close up leaps. If Sleep Darts are on a cooldown or if you miss your shot at him you can also throw down a Biotic Grenade to do some damage while receiving some healing at the same time, but you will have to hope your allies are there to help fend him off because Ana's poor mobility and damage output will make it hard to run away from Winston.
Nano Boosting an ally can also help improve your chances of surviving Winston's Primal Rage by providing possible cannon fodder for Winston to bat around instead of Ana. Nano Boosting an ally will also help protect you against Winston's wild Leap flanks.
Winston's ultimate Primal Rage can be annoying to deal with for Ana, as long as you keep your distance from it you should be okay. Even though Primal Rage has a big hitbox it can still be tough to aim Sleep Darts at him during this time. Even if you do land a Sleep Dart on him, Primal Rage is one of the few ultimates that will continue if he gets awakened while sleeping.

Tracer: Due to Ana's poor mobility, she tends to be weak against offensive flankers like Tracer. Tracer's fast Blinks and small hitbox will make it very difficult to land Biotic Rifle shots at her along with Sleep Darts as well. This makes Tracer one of the best flankers against Ana. Even if you do land a Sleep Dart on Tracer, it will allow all her Blinks and Recall to replenish which will allow her to escape or reposition somewhere else very fast once she awakens.
Your best bet against Tracer is to throw a well aimed Biotic Grenade at her to do some damage, as the splash radius will make it easier to land a shot at her. Try to stick with your allies more so they have your back. Nano Boosting an ally near you will help scare Tracer away from you.
Unfortunately Ana's poor mobility makes her very susceptible to Tracer's ultimate Pulse Bomb, and there is not much Ana will be able to do about that.

Genji: Genji is another fast offensive flanker that will be tough for Ana to deal with. One of the main issues when dealing with Genji is his Deflect, as it will deflect all of your normal abilities. Firing a Sleep Dart at Genji's Deflect could put you to sleep instead, or throwing a Biotic Grenade at him could result in it coming back at you to deal damage and prevent healing done on you or your team. So be very cautious around Genji and watch out for his Deflect and don't fire at him during that time.
Landing a Sleep Dart on Genji is going to be difficult, his Deflect along with his Swift Strike and double jumps will make it extremely hard to land Sleep Darts. If you do manage to put Genji to sleep it will also make his cooldowns for Swift Strike and Deflect wind down making him more powerful once he awakens.
If Genji Swift Strikes up to you, your best bet is to try to throw everything you got it him. First try a Sleep Dart, if that misses use a Biotic Grenade to potentially do some damage to him while healing you up a bit. If Genji uses his ultimate Dragonblade the same thing applies with that as well. You may want to Nano Boost an ally to help fend off the Dragonblade.

Reinhardt: Reinhardt counters Ana mostly due to his large shield, as it will block just about everything Ana can do (besides Nano Boost). Reinhardt's shield can block Ana's Biotic Rifle, Sleep Darts and Biotic Grenades from hitting any of Reinhardt's team behind his shield, all of this can really put a damper on Ana's use during a match.
One tip you can be aware of is that Reinhardt will occasionally drop his shield to fire a Fire Strike. This is an ideal time to throw a precisely aimed Sleep Dart at him to take him out. Putting a Reinhardt to sleep is devastating to the opposing team as he will be unable to use his shield during this time. Although for the full duration of Reinhardt's sleep it will regenerate 1/3 of his shield.
Since Ana snipes from a distance you generally will be safe from Reinhardt most of the time as he does most of his damage in close range with his Rocket Hammer. Although unlike Widowmaker and her Grappling Hook, it will be difficult to reach higher ground where it will be safer from Reinhardt (since Reinhardt has poor vertical mobility) as Ana's mobility is on the weaker side so try your best to keep your distance to avoid being Charged at or attacked at in close range. Keeping your distance from him will also keep you safer from Reinhardt's ultimate Earthshatter.
If you see Reinhart Charging, you have several options, you could try to aim a Sleep Dart at him to put him down. Or if you see Reinhardt charging and trying to pin one of your allies, giving them a Nano Boost could help them survive the pin as it will reduce Charge's damage down to 150 instead of 300, which is enough to save most heroes. Nano Boosting an ally could also help that ally get around Reinhardt to flank him from behind his shield much easier.

Widowmaker: Both Widowmaker and Ana are snipers, but Widowmaker simply does a lot more damage, which can out DPS Ana's Biotic Rifle by 40%, this does not include the fact that Widowmaker can do headshots that do x2.5 the damage also, while Ana does no headshots. Widowmaker's ultimate Infra-Sight only makes it much easier for her to snipe Ana to death when Ana pops in view.
Sleep Darts are usually ineffective against Widowmaker, the two heroes are usually too far away from each other and any good Widowmaker player will strafe side to side to make her a harder target for enemies to hit her, especially from Sleep Darts. Although there is a slim chance of hitting her with a Sleep Dart, if so, disabling her from combat for a short while is very beneficial for your team. Also, if Widowmaker gets hit by a Sleep Dart while using Infra-Sight, the Infra-Sight ability will continue while Widowmaker is sleeping. You must make tough decisions whether or not to throw a Sleep Dart at her during combat, this will come better with practice. If you see Widowmaker standing stationary go for the shot!
Throwing Biotic Grenades at Widowmaker tends to be easier than Sleep Darts and it could do some extra damage to her while also disabling any healing on her at the time as well.
Since Ana keeps her distance from enemies by staying in the backlines, she is generally safe from Widowmaker's Venom Mines.
Nano Boosting an ally (especially a flanker such as Tracer, Reaper, Genji or D.va) can let them have the extra power and protection they need to quickly get to Widowmaker to take her out. Widowmaker's only defense against that is hope to grapple away from it.

Hanzo: Hanzo counters Ana in similar ways how Widowmaker counters Ana. Hanzo can snipe from a distance doing impressive damage with potential headshots, much more overall damage than Ana. Hanzo's Sonic Arrows work similar to Widowmaker's Infra-Sight, enabling Hanzo and his team to spot Ana behind walls making it easy to snipe her when she pops in view.
Ana's poor mobility makes her an easier target for Hanzo's Scatter Arrows, but as long as you keep your distance from Hanzo you should be safer from Scatter Arrows.
As Hanzo revs up a bow shot, he moves considerably slower, which is a better chance for Ana to land a Sleep Dart on him during that time, but since Hanzo and Ana are both long distance snipers, overall it will still be difficult to land a Sleep Dart on a target that is far away. Although landing a Biotic Grenade on Hanzo should be easier and can be very effective in preventing healers from healing him up.
Since Ana snipes from a distance she is generally a bit safer from Hanzo's ultimate Dragonstrike, but Ana's poor mobility will make it extremely difficult to escape from a Dragonstrike if caught in the midst of one.
A Nano Boosted ally will have a much easier time honing in on Hanzo to take him out.

D.va: D.va excels at flanking enemies in close range by boosting quickly up close to her enemies with Defense Matrix to block shots as she is approaching, this can spell bad news for Ana. In close range, D.va can do a lot of damage with her Fusion Cannons and Ana's poor mobility will make it difficult to escape from D.va. Ana's best bet at escaping from D.va is a well aimed Sleep Dart. Although, you must be very careful not to waste a Sleep Dart (or a Biotic Grenade) into D.va's Defense Matrix.
Putting D.va to sleep might give you enough time to escape from her, but keep in mind as soon as D.va awakens her Boosters and Defense Matrix will be available again for use and she may try to catch back up with you.
Throwing a Sleep Dart at D.va from long range can be easy due to D.va's large hitbox and slow movement when firing and she should be a prime target for Sleep Darts because of this. The same thing applies for Biotic Grenades as well, and the prevention of healing from Biotic Grenades can really leave a dent in D.va's HP.
Getting behind a wall to avoid D.va's ultimate Self-Destruct can be difficult for Ana due to her poor mobility.
Nano Boost could help an ally escape from D.va's close up Fusion Cannon damage while also being able to deal with D.va much more effectively.

Reaper: Reaper is an offensive flanker that Ana will have to watch out for. Reaper excels at getting behind the enemy lines with his Shadow Step and Wraith Form abilities and you will have to watch your back from getting attacked by Reaper's deadly close range shotguns. Luckily, Reaper is one of the few offensive flankers that is easier to aim Sleep Darts at, as he doesn't have quick movement abilities like Tracer and Genji. Make sure you do land that Sleep Dart or you will most likely die to Reaper.
Ana's next best option to use against Reaper is Biotic Grenades, which will do some damage to Reaper while also preventing him from getting healed or preventing him from picking up Soul Globes.
Ana's poor mobility makes her very vulnerable to Reaper's ultimate Deathblossom and she will most likely die if caught in the midst of it. Once again the best thing to do against Deathblossom is to quickly take him out with a Sleep Dart before he can do any damage.
If you see Reaper flanking one of your allies, you can give that ally a Nano Boost to help that ally survive and chase Reaper away at the same time. Reaper would have to use his Wraith Form to escape a Nano Boosted ally.

Mei: Mei can be dangerous up close with her freeze gun, but Sleep Darts can be an effective way to counter her up close to prevent her from freezing you or your allies. Keep in mind that when Mei is sleeping, her cooldowns for Cryo-Freeze and Ice Wall will continue, potentially giving her an easier opportunity to escape unharmed once she awakens.
Mei's Ice Walls can act as enormous shields to block Ana's Sleep Darts and Biotic Grenades from hitting Mei's team. Mei can also use an Ice Wall to block Ana from healing her teammates with the Biotic Rifle.
Unfortunately, Mei's self heal (Cryo-Freeze) is the only healing ability in the game that Biotic Grenades have no effect on as Mei becomes invulnerable while healing up in a Cryo-Freeze.
Due to Ana's poor mobility, it can be easy for her to get caught in Mei's ultimate Blizzard, as Ana has no quick means to escape out of it quickly.
A Nano Boosted ally could take out Mei in time before she freezes too many allies. Although, Mei can use her Cryo-Freeze to take cover from a Nano Boosted enemy.

Torbjorn: Both Torbjorn and Ana generally keep a distance from each other. Both of their normal attack weapons are decent at attacking each other from a distance. Ana can deal some damage to Torbjorn's turret safely from a distance while Torbjorn can do some decent damage back at her with his Rivet gun and turret damage. Since Torbjorn's turret is stationary, unscoped shots will be just as effective (if not better) than scoped shots as the hitscan bullets (from scoped) tends to be unnecessary for stationary targets.
Since they tend to be more of a distance from each other, Sleep Darts tends to be less effective on Torbjorn, however a good opportunity to throw a Sleep Dart at Torbjorn is when he is repairing his turret as he will be an easier target to hit during that time.
Torbjorn's ultimate Molten Core can make Ana's life a bit tougher. Molten Core is one of the harder ultimates to aim Sleep Darts at, and if you actually do land a sleep dart on him and he awakens, his ultimate will continue. If you can't land a Sleep Dart on him during his ultimate, your best bet is to simply run away and take cover from it.
Nano Boosting an ally can make it easier for that ally to zone in on Torbjorn and his turret to take them out more effectively, although this can be countered by Torbjorn's Molten Core.

Pharah: Pharah's rockets can do some serious damage to Ana. When dealing with Pharah as she flies in the air, it is usually wise to switch to scoped shots, as the hitscan nature of scoped shots will make it a bit easier to land shots on her while she's flying around.
It will also be extremely difficult to land Biotic Grenades or Sleep Darts on Pharah as she is flying around and you are better off saving them for other enemies or during Pharah's ultimate Barrage. Pharah's Barrage is actually one of the most important (and easy) targets for Sleep Darts as Pharah will be stationary while casting it. Disabling Barrage can save many allies, so act quickly upon it.
If Sleep Dart is on a cooldown while Pharah is using Barrage, you could give one of your allies a Nano Boost to help them take less damage from it, which could potentially save that ally.
When not Barraging, Pharah has efficient ways to deal with Nano Boosted allies, as she can simply Jump Jet away from them or use a Concussive Blast to knock the Nano Boosted ally away from her.

McCree: Since Ana is a backline support sniper, she usually doesn't come into close contact with McCree a whole lot, however if she does, McCree will most likely kill her very quickly with his Flashbang & Fan Fire combo unless Ana is quicker with her Sleep Darts, but this is usually not the case since Flashbangs are much easier to hit targets than Sleep Darts.
Overall McCree can be hard to throw a Sleep Dart at, especially when he uses his Combat Roll. However, McCree's ultimate Deadeye makes him move very slow while revving up his shots, this is the ideal time to quickly throw a Sleep Dart at him before he gets his Deadeye shots off. Deadeye is also one of the most important targets for a Sleep Dart as it will also end the ultimate as well.
McCree is a good target for a Biotic Grenade as most of the time he will have healers providing healing for him and the prevention of healing can make it much easier to take him out.
A Nano Boosted ally might have the extra strength needed to withstand McCree's Flashbang & Fan Fire combo along with being able to escape from his Deadeye more effectively.

Junkrat: Ana will most likely have to watch out for Junkrat's random grenade spam, which can sometime be difficult due to Ana's poor mobility. You may need to use more Biotic Grenade self-heals to deal with that. A lot of times it will be difficult for Ana to have Junkrat within view for Biotic Rifle shots since he is able to lob his grenades while taking cover behind walls or objects. This, along with Junkrat's random movements with Mine jumping also keeps Junkrat a bit safer from Ana's Sleep Darts and Biotic Grenades.
Since Ana is a backline support sniper, she is usually safe from Junkrat's Traps and Mines, but you should still watch out for them and kill them when scoped in closer to the enemy.
When you hear Junkrat use his ultimate Rip-Tire, its best to keep moving far away from it as possible. Ana doesn't have quick movement abilities to avoid it at the last second, so its wise to start moving away from it as soon as you hear him use his ultimate. Also if you spot Junkrat standing still while he controls his Rip-Tire, there is no need to use a Sleep Dart on him during that time as he will still be able to control his Rip-Tire while Junkrat is sleeping. Instead just try to take him out with Rifle shots and Biotic Grenades.
A Nano Boosted ally is not a huge threat to Junkrat as he can simply mine jump away from it or use a Trap to hold the Nano Boosted ally down for a short while. However a Nano Boosted ally may be able to effectively run away from Junkrat's Rip-Tire easier.

Zarya: The main issue when dealing with Zarya is her barriers. Zarya can protect herself or one of her allies with a Particle/Projected Barrier. Particle/Projected Barriers will block everything Ana has, including: Biotic Rifle, Sleep Darts, Biotic Grenades and a Nano Boosted ally. Keep in mind, Particle Barriers only last for a very short period of time so you will still have plenty of opportunities to use your abilities against Zarya, but try your best not to waste them against these barriers.
Zarya can also use her Projected Barrier on her allies that use ultimates that are very prone to Sleep Darts, such as: Pharah's Barrage, McCree's Deadeye, Reaper's Deathblossom and Roadhog's Whole Hog.
A lot of times Ana is in a targetable spot for Zarya's ultimate Graviton Surge, which can be very hard to avoid sometimes as Ana has no way to escape out of it. If you get stuck in a Graviton Surge the best thing to do is to simply throw down a Biotic Grenade at your allies stuck in the surge and keep firing at your allies to heal them up in the surge. You may not want to waste your Nano Boost on one of the allies stuck in the surge as the incoming splash damage may take that ally out anyways, instead you can Nano Boost an ally that is already not in the surge to have that ally help deal with incoming attackers effectively.

Soldier 76: Soldier 76 can do some decent damage at long range with pulse rifle shots and Helix Rockets, so watch out if he targets you and take cover and/or reposition elsewhere.
The biggest advantage Ana has over Soldier 76 is the ability to shut down his Biotic Field with her Biotic Grenade. Biotic Fields are stationary healing sources and enemies will be tempted to gravitate towards it for healing, by simply throwing a Biotic Grenade at the enemies trying to get healed by it will prevent Biotic Field's healing for a short while on those enemies.
Soldier 76's Sprint ability and superior mobility during his ultimate makes him not a prime target for Sleep Darts in general.
If you hear Soldier 76 use his ultimate, it's best to simply take cover from it until it is over. Unfortunately, Ana's slow mobility could get her caught in the midst of it if you can't find a wall to get behind in time. Throwing a Biotic Grenade on Tactical Visor before taking cover can be beneficial in preventing him from getting healed during his ultimate.
Soldier 76 can deal with a Nano Boosted ally by simply sprinting away from it.

Symmetra: Symmetra can be annoying up close with her Projector Beam and it will be hard to deal with that unless you can land a well aimed Sleep Dart on her during this time. Biotic Grenades is your second best defense against Symmetra when she is trying to attack you with her Projector Beam up close.
One thing to note about Symmetra's Photon Shield is that shield regeneration acts differently than health regeneration/healing. This means that Shield HP will still be able to regenerate while under the influence of a Biotic Grenade's healing prevention.
Due to Ana's nature as a backline support sniper, she usually doesn't have to deal with Symmetra's Sentry Turrets. However if you start getting attacked by Symmetra's Sentry Turrets, it can be difficult to aim the Biotic Rifle at them, but remember Biotic Grenades do splash damage and can be a better option to use against Sentry Turrets in situations where you need to kill them quickly.
Symmetra's Teleporter ultimate is generally safe from Ana and her poor mobility. Ana's only advantage at going off on her own is the hopes of landing a Sleep Dart on an enemy while also using a Biotic Grenade to deal damage while providing some healing for her at the same time, but it will be extremely difficult for Ana to hunt down teleporters on her own. Although, Ana could Nano Boost one of her teammates to turn them into a decent Teleporter hunter for a short while, as Nano Boost increases damage reduction and damage output allowing them to possibly track down a Teleporter more effectively.

Ana: An Ana Vs Ana battle usually results in each other throwing their Biotic Grenades at the opposing team's tank or damage soaker to prevent the other Ana from healing those targets up.
Landing a Sleep Dart on the opposing Ana can be very beneficial to disable her healing for the time being, but landing a Sleep Dart on Ana can be difficult because the two Anas will most likely be a distance apart from each other.
Ana can counter a Nano Boosted enemy by potentially landing a Sleep Dart on that target.
News/Home | Blog | Follow | Unlock Full Guide
Attack |
Defense |
Tank |
Support |
 Genji
Genji Bastion
 D.va
D.va Ana
Ana McCree
 Hanzo
Hanzo Reinhardt
 Lucio
Lucio Pharah
 Junkrat
 Roadhog
 Mercy
Mercy Reaper
 Mei
Mei Winston
 Symmetra
 Soldier76
 Torbjorn
 Zarya
Zarya Zenyatta
 Sombra
 Widowmaker
 Tracer
Map Guides
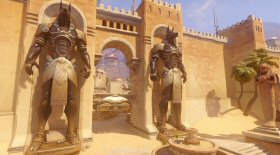 Temple of Anubis
 Hanamura
 Watchpoint Gibraltar
Overwatch Hero Introductions - Basics Guide
How the Mechanics Work in Overwatch
How Headshots Work In Overwatch
Overwatch Game Modes Overview
Overwatch Health Types & Hitpoint Basics
Overwatch Terms, Abbreviations, & Their Meanings
Easiest and Hardest Overwatch Heroes to Master
My Hotkey
Bindings For Overwatch & Why I Use Them
|
Feel free to leave any type of comment, such as how you like the guide and if it helps you at all, or to report something that is inaccurate in the guide. |
