
Pharah In-depth Strategy Guide
( FP's Overwatch Strategy Guide )
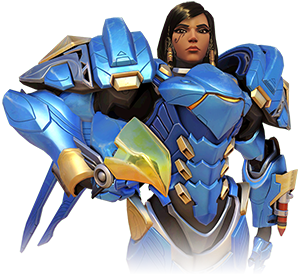 Pharah
is an aggressive assault hero that utilizes a jet pack with a rocket launcher as her
main weapon. Her jet pack offers incredible map mobility that
other heroes don't quite have, which provides her with a lot of flanking
possibilities. Her jetpack allows her to escape out of combat
easily and pretty much get to anywhere on the map with relative ease.
Since Pharah is mostly high in the air, she is especially powerful
against heroes that do only short range damage (such as Reaper, Junkrat,
and Mei), but is vulnerable to heroes that do good long range damage
(such as Widowmaker, McCree, Hanzo, and Soldier 76). Pharah's
ultimate, Barrage, is very powerful, but you need to learn how to use it
correctly as she becomes very vulnerable while using it. Here is
Pharah's weapons and abilities in-depth:
Pharah
is an aggressive assault hero that utilizes a jet pack with a rocket launcher as her
main weapon. Her jet pack offers incredible map mobility that
other heroes don't quite have, which provides her with a lot of flanking
possibilities. Her jetpack allows her to escape out of combat
easily and pretty much get to anywhere on the map with relative ease.
Since Pharah is mostly high in the air, she is especially powerful
against heroes that do only short range damage (such as Reaper, Junkrat,
and Mei), but is vulnerable to heroes that do good long range damage
(such as Widowmaker, McCree, Hanzo, and Soldier 76). Pharah's
ultimate, Barrage, is very powerful, but you need to learn how to use it
correctly as she becomes very vulnerable while using it. Here is
Pharah's weapons and abilities in-depth:
Name: Fareeha Amari
Difficulty: Easy
Role: Offense
Age: 32
Occupation: Security Chief
Base of Operation: Giza, Egypt
Release Date: 10-27-2015
Base Hitpoints: 200
Pharah
|
 |
Main attacking weapon Pharah's primary weapon launches rockets that deal significant damage in a wide blast radius. Ammo: 6Fire Rate: 1 per second Damage: 120 (direct hit) Splash Damage: 13-80 (40 max self damage) Reload: 1 second Headshot?: no Default Hotkey: LM |
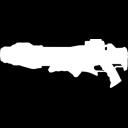
Pharah's rockets fly straight to its target (no arks), do splash damage and also do small knockbacks as well. Rockets are great for short or long range, and deal a decent amount of damage. Rockets have no fall-off damage, this means rockets will do the same amount of damage regardless of how far they are. Rockets do more damage on straight contact than splash damage, but you may find while playing Pharah that it can be easier to hit enemies firing rockets on the ground next to them especially when you are not flying in the air at the time. It is generally much easier to hit targets when you are flying above them, so use your jet pack often, but watch out for heroes that can counter you while flying in the air.
Rockets are not the fastest moving projectiles, so you will want to try and predict where the enemy will be when the rocket reaches them. Players who have experience playing games like Quake, where the rocket launcher is the main weapon of choice, you will already get the hang of how to aim with Pharah's rocket launcher, you will just need to learn how to use her jump jets correctly. Rockets also can hurt yourself if you hit something right next to you (up to 40 self-damage), so keep this in mind.
An interesting fact is that rockets can collide with other rockets in mid-air negating them.
Ability with cooldown Propelled by her suit's thrusters, Pharah soars high into the air. Cooldown: 10 secondsDefault Hotkey: Shift |
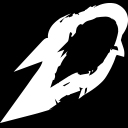
Pharah is currently the only hero in Overwatch that is capable of flying in the air for extended periods of time thanks to her Jump Jet and hover pack abilities. The second closest hero that excels at flying is D.va with her Boosters.
Jump jets serve multiple uses for Pharah. Pharah can use jump jets to escape out of deadly close range heroes such as Reaper, Mei, Reinhardt, and McCree. Jump jets can be used to simply get high above your enemy while they are fighting your teammates while dishing out damage high above with your rocket launcher. Jump jets serve as extremely good map mobility, allowing Pharah to reach places other heroes may not be able to get to. Please note that when you initiate Jump Jet, as soon as you hit a ceiling, you will no longer be able to go up any higher, even if you bypass the ceiling and get back out in the open.
While in the air, if you hold down spacebar, Pharah will float (with her hover packs). If you keep holding spacebar down you will run out of hover fuel, but it replenishes fast enough to allow you to still do some hovering. The hover fuel replenishes fully in about 2.5 seconds when not in use.
One important tip you should know is after pressing the hotkey for the jump jets, you can then press and hold that hotkey again to use her jump jet immediately when it becomes available again. But this only works if you release the button and then press it again once the cooldown begins for the next one. I find myself doing this quite a bit while during intense battles.
One of the drawbacks with jump jet and hover packs is how slow she moves while floating in the air, this allows long range heroes to shoot her down very easily. All these heroes are listed below as her counters. If you find that most of the enemy has a lot of those heroes in the game, you may want to switch to a different hero.
One thing I've noticed when a Pharah becomes especially useful is near the end of a match when everybody is crammed at the final payload destination or capture point and everyone is busy fighting each other. Just fly in the air above everyone and shoot rockets down, most wont even know you are up there since they are so busy fighting down below.
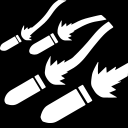
Ability with cooldown Pharah looses a wrist rocket that knocks back any enemies it strikes. Cooldown: 12 secondsDamage: 1 Headshot?: no Default Hotkey: E |

This is a general utility weapon that is used to knock back other heroes, cause confusion to the enemy, break up enemy formations, and many other uses. It has no effect on her teammates, only enemies and herself.
Another important use of concussive blast, is Pharah can use it to propel herself quickly in any direction, similar to a rocket jump in Quake. So start practice using this for basic mobility.
A lot of maps have deadly pits where you can simply fall into and die. As Pharah you should know all these pits and you can use them to your advantage by using a concussive blast to attempt knocking an enemy into one of these pits. I have done this multiple times myself already and feels great to pull one off correctly.
|
ULTIMATE |
Ultimate Ability Pharah directs a continuous salvo of mini-rockets to destroy groups of enemies. Duration: 3 secondsDamage: 40 per rocket (2500+ if all rockets connect) Headshot?: no Default Hotkey: Q |
Pharah's ultimate Barrage is extremely deadly. Keep in mind that when you use Barrage, Pharah will remain immobilized in place until she is done with the Barrage. This makes her very vulnerable to enemy fire. When I first played Overwatch, I picked Pharah first, and I found out real quick that you need to have a strategy for when you use her ultimate, as you can easily die when using it. Here are some tips you can use for knowing when to use her ultimate:
- Focus fire on the following enemies first as they can shoot you down easier: McCree, Genji, Lucio, Soldier 76, Widowmaker, Bastion, Hanzo, Roadhog, and Zenyatta. You can also simply make sure these enemies are not around (or dead) before using Barrage.
- Get real high above your enemy where you are harder to spot, then use it.
- Make sure you are not alone when using it as you will be a much easier target. Have your teammates distract them while you use Barrage in an unexpected spot.
- Some maps have certain spots where you can hide and use Barrage, be mostly covered, and deal decent damage. I will list these spots later on.
Barrage pairs well with these allied abilities:
- When Zarya uses her Gravitation Surge ultimate (makes all enemies clump up together).
- When Reinhardt uses his ultimate Earthshatter (slams the ground in front of him and drops all the enemies in front of him).
- When Mei uses her ultimate Blizzard (slows and freezes all enemies in a large radius).
- When D.va uses her defense matrix ability (stops all incoming projectiles for a few seconds).
- When a beefy ally tank gets in front of you (Roadhog, Winston, Reinhardt).
Pharah's Strength and Weaknesses Vs Other Heroes

Mei: Mei is deadly close up with her freeze gun, and since Pharah can just fly up away from her, Mei is not much of a threat to Pharah. If Mei uses her ice wall, Pharah can just boost up in the air and shoot over the ice wall, thus making Mei's ice wall less useful against a Pharah. Mei's ultimate Blizzard tends to also be less useful against Pharah since she is always high up in the air to avoid it. The main thing you have to watch out for is her medium range icicle shots, even then it's not that powerful of a weapon.

Junkrat: Virtually all of Junkrat's weapons are ground based, which means Pharah is mostly in the clear with her air mobility. A good Junkrat player may be able to hit you in the air with his frag launcher, but it's tough.
If you hear "Fire in the hole!", that means an enemy Junkrat has unleashed his ultimate Rip Tire, simply use your jet packs to fly in the air to avoid it. If Jet packs are on a cooldown, then Concussive shot works good too against tires, especially if you can use it to propel yourself away from it.
Barrage can be effective against Junkrat, but if he catches it in time he can Mine jump away from it, or even attempt to get some easy frag grenade shots on you.

Reaper: Reaper's shotguns are only great for close range attacks, which gives Pharah the advantage by flying away from Reaper if she comes in contact with him. Be careful when flying around the air with ledges around you as Reaper may use his teleport ability to get up on those ledges to get close to Pharah and dish out damage to you with his shotguns. It only takes two good shots at full health and Pharah is dead. Reaper's ground ultimate (Death Blossom) is not very effective on Pharah thanks to her jet packs.
Pharah can easily escape from Reaper's ultimate (Death Blossom) by simply using Jet Packs to fly in the air to avoid it, or by using a Concussive Blast to knock Reaper away from her (or from her allies).
Reaper can avoid Pharah's ultimate Barrage by using Shadow Wraith, if it's not available, then Shadow Step can be a backup counter for it.

Winston: Winston doesn't have much air fire besides the occasional leap in the air to do some quick damage with his Tesla Cannon. If he does leap at you, remember you can throw a Concussive Blast at him to knock him away from you. Because of this, Winston is not much of a threat to Pharah as long as she stays in the air most of the time. However, Winston's barrier shield does a decent job at protecting his team from incoming rockets, but only temporarily.
Pharah is usually in the clear of Winston's ultimate (Primal Rage) thanks to her jet packs.
Barrage is not very effective against Winston since he can just use a Barrier shield to block it and protect his team or leap out of the way from it.

Lucio: Even though Lucio does a good job of buffing his teammates (with healing and speed), he is not much of a threat to Pharah himself. His Sonic Amplifier weapon is one of the slower moving projectiles in the game, thus making it hard to hit moving objects flying in the air from a distance. Though a good Lucio player may be able to aim well from distances, giving Pharah only a slight threat in that case.
However, Lucio's ultimate Sound Barrier is a strong counter to Barrage.

Symmetra: Pharah will usually never have to worry about Symmetra. Symmetra's Sentry Turrets are not much of a threat to Pharah since she is always flying in the air, and even then her rocket launcher is one of the easiest weapons to kill Symmetra's traps with. Symmetra's weapons are very weak to Pharah and her ultimate (Teleporter) is more easily visible to a flying Pharah.
Barrage is also effective against Symmetra since she has poor mobility to dodge out of the way quick enough from it.

Zarya: Zarya is not much of a threat to Pharah. Zarya's Particle Cannon is hard to hit enemies far away or up in the air, as explosive charges won't be able to do their AOE damage to hit Pharah while she is flying and hovering around in the air, this makes damaging Pharah extremely difficult for Zarya.
Be careful spamming rockets down at Zarya, because she can turn on her Particle Barrier to block and absorb all the damage from your rockets and transfer the energy to enhance her Particle Cannon. She can also put a Projected Barrier on an ally which will do the same thing.
Since Pharah is usually in the air with her Jet Packs, she is usually in the clear of Zarya's ultimate Graviton Surge (since it is a ground ability). But if for some odd reason Pharah gets trapped in it, she doesn't have much to counter it besides using her Barrage ultimate (Jet packs won't get her out of it).
Speaking of Barrage, it can be deadly against Zarya due to her poor mobility to dodge it, but she can use a Particle Barrier to protect herself (only for 2 seconds though).

Reinhardt: Another hero Pharah doesn't need to worry much about. Reinhardt's only air weapon is a slower moving projectile (Fire Strike) that he can only use every 6 seconds, it is powerful though, as each hit does 100 points of damage. With Pharah, just make sure you keep your distance from Reinhardt and you'll be fine. Pharah's rocket packs allow her to get way above and around Reinhardt's massive shield and dish out damage straight to Reinhardt.
Most of time I recommend shooting at other visible targets and avoid Reinhardt unless you have clear shots at him. Be careful using your ultimate around Reinhardt as he can easily Fire Strike you while barraging. I would only use Barrage immediately right after he uses a Fire Strike so he can't use one against you, or if he is disabled from combat at the given time.

Roadhog: One of Pharah's worst nightmares is being hooked by a Roadhog, and it isn't too difficult for Roadhog to hook a Pharah as long as she comes within range of him, and it usually results in a kill for Roadhog. Roadhog also has decent medium range with his alternate scrap gun fire, making Pharah a somewhat easy target for Roadhog. Roadhog's massive hitpoints and healing only makes it harder for a Pharah to kill Roadhog.
As Pharah, refrain from using hover packs much around Roadhog, this makes you a harder target to chain hook. If you see yourself getting too close to Roadhog, use a Concussive Blast on him to keep his Chain Hook away from you. Keep your distance while spamming rockets at him and he shouldn't be too bad to deal with.
Be cautious using Barrage close to a Roadhog, as he can easily Chain Hook you in totally canceling the effect.
Pharah's best bet at countering a Chain Hook is by jump jetting away while at the same time using a Concussive Blast to propel yourself away as well.

Widowmaker: Another major threat to a Pharah, Windowmaker can easily shoot her down from a distance with her scoped sniper shots. Widowmaker's ultimate (Infra-Sight) makes her whole team easier to spot Pharah flying around. Best thing to do is avoid being exposed to a Widowmaker and refrain from using hover packs so you are a harder target to hit. Try and sneak around the map and flank Widowmaker if possible.

Soldier 76: Soldier 76's weapon is very powerful even in longer ranges (even with fall-off distance damage), and makes firing down a Pharah relatively easy for him. Pharah's rockets can do some damage too but Soldier 76 can use Biotic Fields to heal that up along with the option of getting under something to block her away from him.
Pharah's ultimate Barrage can be countered by a quick Helix Rocket then a few rifle shots from Soldier 76.
Pharah is a great target for Soldier 76's ultimate Tactical Visor, as it will auto aim at her as she's flying around in the air. The best thing for Pharah to do in this situation is to immediately drop down (stop hovering) and quickly lose line of sight with Soldier 76's aim bot.

McCree: Even though Pharah is mostly in the clear of McCree's flashbangs, McCrees make easy work of Pharahs thanks to his powerful revolver. McCree can use combat rolls to avoid your rockets and his ultimate (Deadeye) works well against Pharahs. As Pharah, just make sure you engage a McCree when your whole team is fighting at the same time distracting him, and try to keep your distance away from him. Refraining from using hover packs in mid-air will make it harder for a McCree to aim at you.

Bastion: Bastion's Sentry mode with gatling gun can be devastating to Pharah, it only takes a few shots and your dead. Pharah does have great map mobility, but her air flying mobility makes her such an easy target to shoot out of the air for Bastion.
It can be hard to deal with a Bastion. You will generally need to be as sneaky as possible while firing rockets at him. Try to get shielded if you can, such as from a Zarya's Projected Barrier or behind a Reinhardt's shield if possible. Take unusual routes that Bastion would not expect someone to take and attempt to flank him from behind if you can. The further away from Bastion you are the better you will do against him because Bastion's gatling gun does not perform well in very long ranges, where as Pharah's rockets do no fall-off distance damage. Keep in mind that a Concussive Blast does not affect a Bastion Sentry at all, as it will not knock him around.
Be careful using Barrage around a Bastion Sentry as he can easily shoot you down very fast while Barraging. Before using Barrage, either make sure a Bastion Sentry is out of your line of sight or you have an ally shielding you while Barraging.
When Bastion uses his ultimate Tank Form, you are generally safer flying in the air, but try not to do too much hovering as he can still aim and hit you.

Genji: Genji is only somewhat of a threat to Pharah. Genji's shurikens can be difficult to aim, but in a skilled players hands the shurikens can be quite deadly to a Pharah. Even though Genji can deflect Pharah's rockets and concussive blasts, it is practically useless because deflected rockets are slower moving projectiles that Pharah naturally avoids as she is flying around.
Genji can avoid Pharah's Barrage with a Deflect as he runs behind a wall to avoid the rest of it. Pharah can simply launch into the air when Genji uses his ultimate (Dragonblade) to avoid it.

D.va: D.va's fusion cannons can be a big threat to Pharah. Her cannons don't do a whole lot of damage at long ranges, but be careful getting too close to D.va, as her cannons become more powerful at shorter/medium ranges. D.va can boost straight up to you and shoot you up close with her cannons. Use a concussive blast on D.va if you get to close to her. D.va is also a great counter to Pharah's ultimate Barrage thanks to her Defense Matrix ability.
D.va's Self-Destruct can be very affective against Pharah, as she is floating around in the air it can take her awhile to get down and take cover, potentially not enough time for her to take cover and the Self-Destruct can kill her quite easily then.

Hanzo: Shooting Pharah down as Hanzo can be very difficult, as aiming at her with Storm Bow shots while Pharah is moving around in the air can be hard to land shots on. While revving up Storm Bow shots Hanzo moves a bit slower, thus making it easy for Pharah to fire rockets down at him. Pharah can also use a Concussive Blast on Hanzo if she needs to either reload or knock Hanzo around to protect her from bow shots.
A good Hanzo player can be devastating to a Pharah. With good aim, Hanzo can shoot Pharah down from the air more consistently, but this will take a lot of practice.
Hanzo's Sonic Arrow makes it easier to spot a Pharah's movement behind walls. This can make lining up a shot easier for him and his team. As Pharah, you can possibly flank Hanzo from behind thanks to your superior mobility with jump jets.
Pharahs tend to be out of range of Hanzo's ultimate Dragonstrike, since she is usually flying around in the air. But Hanzo will need to watch out for Pharah's ultimate Barrage since his mobility is not the greatest for avoiding it. When Pharah uses Barrage, Hanzo can fire a headshot on her to take her out with one shot (as long as she is not protected in some way).

Torbjorn: Torbjorn's rivet gun is not too effective against Pharah since his long range shots have a small travel time and also arch as it goes further, thus making it harder for him to aim at Pharah while she is flying in the air. Turrets is the main thing a Pharah has to watch out for.
Remember you can try to hit a wall/ground next to the turret for the splash damage to take it out while you are hopefully able to stay covered from it.
While a Concussive Blast does nothing against a turret, it can be used to knock back Torbjorn while he is repairing his turret to disable him on repair for a few seconds. Concussive Blast is especially useful on a Molten Core Torbjorn.

Ana: Due to Ana's nature as a backline support sniper with poor mobility, she isn't to difficult to aim rockets at. Ana's Biotic Rifle is not too powerful against Pharah, but from long distances Ana is better off using scoped shots for the instant hitscan bullets rather than unscope projectiles against Pharah as she is flying around in the air.
It will also be extremely difficult for Ana to land Biotic Grenades or Sleep Darts on Pharah as you are flying around and Ana is better off saving them for other enemies or during Pharah's Barrage. Pharah's Barrage is actually one of the most effective (and easy) targets for Ana's Sleep Darts as Pharah will be stationary while casting it. Getting hit by a Sleep Dart while casting Barrage will put an end to it, which could potentially waste your ultimate quickly.
If Ana's Sleep Dart is on a cooldown while Pharah is using Barrage, Ana could give one of her allies a Nano Boost (Ana's ultimate) to help that enemy take less damage, which could potentially save that enemy from the Barrage.
When not Barraging, Pharah has efficient ways to deal with a Nano Boosted enemy, as she can simply Jump Jet away from them or use a Concussive Blast to knock the Nano Boosted enemy away from her.

Pharah: When fighting another Pharah, it usually comes down to who has a better aim with rockets in the air, and this will take some practice.
When an enemy Pharah is using Barrage, Concussive Blast has absolutely no effect on it as it will NOT knock the target away.

Tracer: Tracer has very poor vertical mobility, so it's usually very difficult for Tracer to reach close to flying objects. This is the reason why Pharah has the advantage over Tracer. Tracers can be hard to hit thanks to her blink ability, but it only takes a few good rocket shots to kill her. Be careful when landing on the ground from a Jump Jet, as Tracer can do some good damage to Pharah with her Pulse Pistols. You can use a Concussive Blast to propel yourself away from Tracer until you can use Jump Jet again.
Pharah can usually avoid Tracer's ultimate (Pulse Bombs) thanks to her flying ability, but if Tracer manages to stick a Pulse Bomb on you, there is nothing you can do to counter it.
Tracer can usually just blink away from Pharah's ultimate (Barrage).

Mercy: Mercy is not much of a threat to Pharah, but she can be annoying with her single hero healing/buffing, but it's not too bad since Pharah does area damage to more than one hero. I've noticed that Pharahs can spot a Mercy easier thanks to her jet pack ability. And if you see her, focus fire on her first.

Zenyatta: Zenyatta's Discord Orb (amplifies damage to anyone who hits the target) puts a damper on anyone's day, and Pharah is a prime target for the Discord Orb. Although, you can use Pharah's Jet Packs to help find a wall to get behind to remove the orb. You can also use Pharah's Concussive Blast to propel yourself quickly behind a wall to remove the orb as well.
Barrage can be devastating to Zenyatta and his team, but he can use his ultimate Transcendence against it to block Barrage's shots and save his allies from it. Zenyatta's volley shot (or orb shots to the head) can also be used against a Pharah using Barrage to take her out more effectively.
Pharah's Allied Synergies Guide
News/Home | Blog | Follow | Unlock Full Guide
Attack |
Defense |
Tank |
Support |
 Genji
Genji Bastion
 D.va
D.va Ana
Ana McCree
 Hanzo
Hanzo Reinhardt
 Lucio
Lucio Pharah
 Junkrat
 Roadhog
 Mercy
Mercy Reaper
 Mei
Mei Winston
 Symmetra
 Soldier76
 Torbjorn
 Zarya
Zarya Zenyatta
 Sombra
 Widowmaker
 Tracer
Map Guides
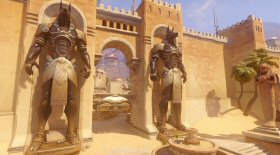 Temple of Anubis
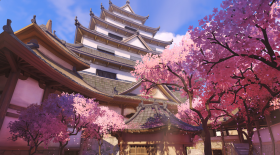 Hanamura
 Watchpoint Gibraltar
Overwatch Hero Introductions - Basics Guide
How the Mechanics Work in Overwatch
How Headshots Work In Overwatch
Overwatch Game Modes Overview
Overwatch Health Types & Hitpoint Basics
Overwatch Terms, Abbreviations, & Their Meanings
Easiest and Hardest Overwatch Heroes to Master
My Hotkey
Bindings For Overwatch & Why I Use Them
|
Feel free to leave any type of comment, such as how you like the guide and if it helps you at all, or to report something that is inaccurate in the guide. |
