D.Va - Members Area Guide
( FP's Overwatch Strategy Guide )

D.va's Enemy Vs Ally Ultimate Comparison
VIDEOS: Great places where you can do a Self-Destruct launch at:
~ VIDEOS COMING SOON! ~
| Payload | Point Capture | Hybrid | Control |
|---|---|---|---|
| Dorado | Hanamura | Hollywood | Illios |
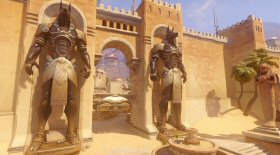
| Route 66 | Temple of Anubis | King's Row | Lijiang Tower |
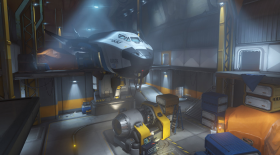
| Watchpoint Gibraltar | Volskaya Industries | Numbani | Nepal |
D.va's Allied Synergies
D.Va's top support heroes:
1) Zenyatta: Even though Zenyatta's Harmony Orb can keep D.va healed up and allowing her to not worrying about boosting to health packs as much, she is generally not a prime candidate for the Harmony Orb since D.va's boosters allow her to constantly fly to health packs to refill up and her Defense Matrix ability can block incoming shots, so she isn't a prime target for healing. Not to mention D.va's ultimate will blow up her mech anyways and she can then call down a fresh one with full health, so healing her is not that important. However if D.va is a ways off from using her ultimate (Self-Destruct), then she will benefit from having the Harmony Orb on her, especially if she is playing aggressively and constantly harassing the enemy.
Zenyatta can setup ambushes with D.va by giving her the Harmony Orb and she can then boost to a specific enemy such as Widowmaker or another stray enemy that has his Discord Orb on them. In this case, healing D.va tends to be powerful in this situation, and since D.va is mostly comprised of armor, healing armor up is a lot more efficient than healing regular HP. If it's not a life/death situation for D.va, Zenyatta is generally better off putting his Harmony Orb on a different ally that can make better use of it.
Zenyatta is a very squishy support hero, so keep an eye out on him and if he is getting flanked, boost up to him and knock down enemies and then activate Defense Matrix so he can freely fire his energy orbs at the flankers, follow that up with Fusion Cannons.
Zenyatta's ultimate Transcendence will rapidly heal you, allowing you to safely dish out Fusion Cannon damage close up to your enemies. But keep in mind it is generally a good idea to space out a Self-Destruct with Zenyatta's Transcendence, as both ultimates will make the enemies run away from them. Spacing them apart keeps your enemies away for a longer period of time.
Since D.va is mostly comprised of armor, she can soak up a lot of damage, especially if she is being healed from multiple sources when a Biotic Grenade is on her.
If Ana is getting flanked and misses a Sleep Dart, D.va can quickly boost up to Ana and protect her with Defense Matrix or Fusion Cannons up close.
Ana's ultimate Nano Boost has only mediocre use with D.va. Unfortunately, Nano Boost does not increase the speed of D.va's Boosters and she will still move somewhat slow when firing, so Nano Boost's speed does not help D.va much. But the increased damage reduction and damage output can allow her to safely stay in the front lines to soak up damage and kill enemies up close with her Fusion Cannons more effectively.
Ana's Nano Boost has no effect on D.va's ultimate Self-Destruct and D.va will lose Nano Boost if she activates her ultimate.
3) Symmetra: D.va only slightly benefits from Symmetra's Photon Shield. Photon Shield only provides a +25 HP regenerating shield to D.va's 500 native HP pool, which is not a huge difference for her. D.va also tends to blow her mech up frequently anyways, so even though Photon Shields do help a little, it's not as useful as it is for more squishy heroes. When D.va uses Self-Destruct she will lose her Photon Shield and Symmetra will have to give her a new one.
Symmetra can place her Sentry Turrets in rooms/hallways potentially protecting health packs. D.va relies heavily on boosting to health packs and this can make it safer for D.va to boost around the map for healing. D.va can also intentionally boost into a room filled with Sentry Turrets to lure enemies into the traps.
Symmetra is a relatively slow moving hero with no movement abilities, so if she is getting flanked she has little to defend against it besides using her Projector Beam. D.va can boost to her rescue and then knock down the flankers by boosting into them. D.va can then use Defense Matrix to block shots from the flankers and then finish them off with Fusion Cannons up close.
Even though D.va can simply boost back to the fight quickly, she can still take advantage of Symmetra's ultimate Teleporter to get back even faster.
D.va can launch a Self-Destruct towards Symmetra if she is overwhelmed by enemies. At this time, Symmetra can put Sentry Turrets on the ground near her to slow enemies down around her, making it harder for them to run away from the Self-Destruct.
4) Lucio: Lucio's auras are useful for D.va as it can provide an ample flow of healing, allowing her to stay in the fight longer without worrying about boosting to health packs as much. Lucio's speed aura can allow D.va to move a bit quicker while firing her Fusion Cannons and allowing her to move faster while having Defense Matrix out. Please note that speed aura has no effect on Booster's speed. Also, keep in mind that Lucio's auras only work when you stay within 30 meters of each other and keep line of sight with him as well.
Both Lucio and D.va have ways to knock close enemies away from them. D.va can boost through enemies to knock them down and Lucio can use his Soundwave ability to blow people away from him. Since they both have capabilities to do this, it lessens the synergistic value between the two heroes.
Lucio tends to chill in the backlines of his team while boosting his teammates with healing and speed. If Lucio gets overwhelmed with enemies he can take advantage of D.va's Defense Matrix to keep him and his auras alive more often.
Lucio's ultimate Sound Barrier can allow D.va to boost right up close to the enemy for a short period of time to dish out as much Fusion Cannon damage as possible.
It's generally a good idea to space out a Self-Destruct with Lucio's Sound Barrier, as both of them will make enemies run and hide until either one is over. Why not space them out so it keeps enemies away for a longer period of time?
5) Mercy: Since D.va's boosters allow her to constantly fly to health packs to refill her HP up and her Defense Matrix ability can block incoming shots, she isn't a prime target for healing. Not to mention D.va's ultimate will blow up her mech anyways and she can then call down a fresh one with full health, so healing her is not that important. But if there are no other options, Mercy can heal D.va for easy ultimate charge and preventing D.va from worrying about boosting to health packs as much.
Mercy's damage boosting can be effective with D.va's Fusion Cannons, but remember Fusion Cannons are really only useful in close range which could expose Mercy to more danger. Damage boosting D.va's Light Blaster gun in human form is actually very effective and is a great option for Mercy to damage boost. Unfortunately, Mercy's damage boost does not work on D.va's Self-Destruct.
Following D.va as Mercy is generally safe because D.va's mech is a big target and can soak up a lot of damage with Defense Matrix to protect Mercy. But Mercy needs to be careful where D.va uses her boosters at, as she may be going for health packs or trying to flank the enemy somewhere more dangerous.
Mercy's Resurrect is not overly powerful with D.va, since she can just use her boosters to quickly get back to the fight faster after dying, but resurrecting D.va is still very effective nonetheless.
D.Va's top tank synergies:
1) Zarya: After boosting up towards an enemy, Zarya can give D.va a Projected Barrier to protect her while she is flanking an enemy. This serves to be very powerful for charging up Zarya's Particle Cannon while providing more protection for D.va. If you have a Projected Barrier on, refrain from using Defense Matrix while it's on to take full advantage of the barrier.
Zarya's personal Particle Barrier only lasts 2 seconds, which means out of all the tanks she is the most vulnerable (most of the time). D.va can help protect Zarya with Defense Matrix, but like I said before, refrain from using it if you or Zarya have a Particle Barrier on. I would also consider canceling Defense Matrix (by pressing the fire button) so that the barriers can absorb the damage to make Zarya's weapon stronger.
Zarya's ultimate Graviton Surge (clumps enemies up together) pairs well with D.va's Self-Destruct (to wipe them all out).
2) Reinhardt: Getting behind Reinhardt's shield is only somewhat effective for D.va. Remember in order for D.va to do any serious damage, she needs to be up close to the enemy and most of the time Reinhardt's shield is simply to far away from the enemy. D.va can still do decent damage to big targets such as tanks from medium range, in which case Reinhardt's shield may work okay for D.va sometimes.
If you see Reinhardt charging towards a bunch of enemies, you can assist him by boosting after him to knock down any other enemies around him and then use Defense Matrix to help Reinhardt survive after charging.
Self-Destruct pairs very well with Reinhardt's ultimate Earthshatter. Earthshatter will drop and stun enemies to the ground, preventing them from running away from a Self-Destruct.
3) Winston: Winston's Barrier Projector (shield globe) can be beneficial for D.va if she is able to get close to the enemy with it, as Fusion Cannons are really only effective in close range. Since both D.va and Winston can boost/leap up close to the enemy, they can plan a flank together on an enemy and then throw down a Barrier Projector for protection. D.va can use Defense Matrix while they are boosting/leaping to protect them while they are approaching their destination. Both D.va and Winston's boost/leap are on relatively short cooldowns, so after successfully flanking an enemy, they can then boost/leap back out to safety or even to another enemy if they have enough health for it.
Self-Destruct does have the possibility to pair well with Winston's ultimate Primal Rage. Primal Rage can knock enemies into the Self-Destruct explosion and preventing them from running away from it by knocking them back into it. Winston's Leap goes on a 2 second cooldown so he can leap in front of the fleeing enemies and then bat them back into the explosion.
Winston's Barrier Projector works nicely for D.va in human form, allowing her to dish out blaster gun damage from afar safely.
4) Roadhog: If Roadhog Chain Hooks an enemy into him, D.va can use Defense Matrix to prevent the victim from doing any damage back at Roadhog. Defense Matrix in general is very helpful for Roadhog as he has no means of damage mitigation and it can protect him while he is using his Take a Breather ability (self heal).
Roadhog's ultimate Whole Hog can work okay with D.va's Self-Destruct. Whole Hog can possibly knock enemies into a Self-Destruct, but it can also knock enemies away from it as well, so some planning between these two ultimates are necessary to pull them both off successfully.
5) D.va: Two D.vas don't really have any effective synergies together. You can have one D.va use Defense Matrix while the other one dishes out Fusion Cannon damage, and then switch for a continuous defense/offense.
Two D.vas can make it harder to obtain health packs since both of them will be competing for them. If you have two D.vas its a good idea to have a strong healer on the team such as Mercy or Lucio.
It's generally a good idea to space out Self-Destructs with multiple D.vas. Self-Destruct will make enemies run and hide, by spacing them apart you will keep your enemies away for a longer period of time. If you get really creative, you can make two simultaneous Self-Destructs succeed if you throw one to make enemies run into the other one. This might take some planning and practice though.
D.Va also pairs well with:
1) Widowmaker: D.va can use her Boosters to knock down enemies making it easier for Widowmaker to fire sniper shots at the knocked down enemies. D.va's Defense Matrix can provide some nice temporary protection for Widowmaker allowing her to safely stay out in the open to dish out sniper damage.
If Widowmaker is getting flanked, D.va can boost to her rescue and then turn on Defense Matrix for protection.
Widowmaker's ultimate Infra-Sight can give information to D.va allowing her to use her Boosters more effectively to flank enemies and to stay out of too much danger. It can also allow D.va to launch a Self-Destruct towards a bunch of targets hidden behind walls.
2) Torbjorn: D.va's Boosters can knock down enemies which can make it difficult for enemies to take out Torbjorn's turret fast enough. D.va can protect Torbjorn and his turret with Defense Matrix, which will also increase Torbjorn's survivability while repairing his turret.
Torbjorn's Armor Packs have mediocre use with D.va. Increased armor will simply increase the survivability of D.va's mech a bit longer, allowing you to stay close to your enemies and dish out Fusion Cannon damage for a longer duration before needing to boost to health packs. If D.va's mech gets destroyed, she pops out of it and only has 150 HP, giving the little D.va an Armor Pack will greatly increase your survivability to dish out blaster damage with your Light Gun until you can call down a new mech.
Self-Destruct can pair well with Torbjorn's turret and his ultimate Molten Core, but only if the Self-Destruct is done in such a way that forces enemies to run into Torbjorn's turret, which is usually not the case. But depending on the map, Torbjorn can build his turret in a spot where enemies could run into if struck by a Self-Destruct. However, this might take some planning.
3) Soldier 76: D.va can use her Boosters to knock down deadly close up enemies such as Reinhardt and Mei, thus giving Soldier 76 better survivability.
Even though D.va can boost to health packs fast, she can still take advantage of Biotic Fields, which will allow her to stay in the fight much longer enabling her to keep her Fusion Cannons going non-stop.
D.va can protect Soldier 76 from incoming fire with Defense Matrix, which especially comes in good use when Soldier 76 uses his ultimate Tactical Visor at the same time as well.
Self-Destruct can pair well with Soldier 76's Tactical Visor by making enemies run away from the explosion, this can give Tactical Visor easy shots at the fleeing enemies. But most of the time I recommend separating the two ultimates, since both of them will make enemies run and hide. By splitting them up you can keep your enemy away for a longer period of time.
4) Mei: D.va can use her Boosters to knock down enemies, which can give Mei more time to safely freeze enemies up close. Dva's Boosters also pair well with Mei's ultimate Blizzard. Mei can throw down a Blizzard, then D.va can Boost through all the enemies over the Blizzard to knock them down, preventing them from escaping it.
Up close and D.va can protect Mei with Defense Matrix, which will enable Mei to continue freezing enemies without worrying about using her Cryo-Freeze as much. Mei can also protect D.va by blocking shots with Ice Walls, this will enable D.va to dish out plenty of damage up close with Fusion Cannons.
When using Self-Destruct, Mei can throw up an Ice Wall to prevent enemies from escaping the explosion. Blocking hallways or rooms off with an Ice Wall can prevent them from losing line of sight from the Self-Destruct. Mei's Blizzard can also pair well with Self-Destruct. The Blizzard will slow/chill enemies enough to prevent them from running away from the explosion. This is really only recommended if there are a lot of enemies to take care of.
5) Pharah: Before Pharah activates her ultimate Barrage, you can quickly boost to her side and then use Defense Matrix to protect Pharah while she is Barraging. This generally only works though if you are standing on something.
Self-Destruct can act as a great crowd control for Pharah, as she can easily pick off only a few enemies at once with rockets instead of being bombarded by a bunch at the same time.
D.Va's neutral synergies:
1) Junkrat: D.va's Boosters can knock down enemies giving Junkrat easy targets to fire grenades at. D.va's Boosters can also knock down deadly close up enemies like Mei, Reinhardt and Reaper from getting too close to Junkrat. D.va's Boosters can also knock down enemies while a Rip-Tire (Junkrat's ultimate) is traveling, so it will be much more successful at surviving and preventing targets from running away from the tire explosion.
D.va can protect Junkrat with Defense Matrix when they are close to enemies. D.va can also increase the likelihood of a Rip-Tire exceeding by blocking shots using Defense Matrix as the tire is traveling to its destination.
It's usually not the best idea to use a Self-Destruct at the same time Junkrat uses his Rip-Tire. This is because enemies would already be running and hiding from the Rip-Tire anyways, which will also make it easy for them to stay clear of the Self-Destruct as well. It's usually better to wait right after the explosion of Rip-Tire to start Self-Destruct to keep enemies away more.
2) Hanzo: D.va can use her Boosters to knock down enemies, making it easier for Hanzo to fire bow shots at the knocked down enemies. D.va's Defense Matrix can provide some nice temporary protection for Hanzo allowing him to safely stay out in the open to dish out damage.
Hanzo's Sonic Arrow can give information to D.va allowing her to use her Boosters more effectively to flank enemies and to stay out of too much danger. It can also allow D.va to launch a Self-Destruct towards a bunch of targets hidden behind walls.
Hanzo's ultimate Dragonstrike combined with D.va's launched Self-Destruct can really confuse the enemy on where to run to and can potentially wipe a few enemies out in the process.
3) Genji: D.va can keep up with Genji's superior mobility thanks to her Boosters. D.va can knock down enemies with her Boosters that Genji's Deflect does not work on (like Mei, Winston, Symmetra, and Zarya).
D.va can protect herself and Genji with Defense Matrix, which could allow Genji to safely use his ultimate Dragonblade without too much harm.
D.va can use a Self-Destruct to scatter enemies around, giving Genji an easier opportunity to pick off fleeing enemies.
4) Bastion: If a Bastion Sentry is getting ambushed, D.va can boost to his aid and knock them down with Boosters and then activate Defense Matrix to protect Bastion from further damage.
A Self-Destruct can be used to clear the area out around Bastion, giving him an easier time to deal with his enemies.
Bastion's ultimate Tank Form can be protected by D.va's Defense Matrix or by knocking enemies down with her Boosters.
5) Reaper: D.va can provide crowd control support for Reaper by Boosting through enemies and knocking them away from Reaper. D.va's Self-Destruct also acts as great crowd control for Reaper allowing him to pick off fleeing enemies and letting him only focus on no more than a few enemies at a time. Sometimes a Self-Destruct will force enemies to scatter behind walls or into hallways in which Reaper can be waiting to pick off a fleeing enemy.
Before Reaper activates his ultimate Deathblossom, D.va can boost to his side and then activate Defense Matrix at the same time with his Deathblossom to ensure Reaper won't die while using it.
6) McCree: D.va can use her Boosters to knock down enemies making it easier for McCree to Flashbang or fire at the knocked down enemies. D.va's Defense Matrix can be used while McCree is using Deadeye for some extra protection. Besides that there isn't much else the two can do together. D.va's ultimate Self-Destruct does not affect Deadeye much.
7) Tracer: D.va can keep up with Tracer thanks to her Boosters. D.va can knock down enemies with Boosters allowing Tracer to get some easy shots in.
D.va can protect Tracer with Defense Matrix, which can allow Tracer to safely throw out a Pulse Bomb without too much harm.
D.va can use a Self-Destruct to scatter enemies around giving Tracer an easier opportunity to pick off fleeing enemies.
Free Guides Menu:
News/Home | Blog | Follow | Unlock Full Guide
Overwatch Hero Introductions - Basics Guide
How the Mechanics Work in Overwatch
How Headshots Work In Overwatch
Overwatch Game Modes Overview
Overwatch Health Types & Hitpoint Basics
Overwatch Terms, Abbreviations, & Their Meanings
Easiest and Hardest Overwatch Heroes to Master
My Hotkey
Bindings For Overwatch & Why I Use Them
|
Feel free to leave any type of comment, such as how you like the guide and if it helps you at all, or to report something that is inaccurate in the guide. |


 Sombra
 Temple of Anubis
 Hanamura
 Watchpoint Gibraltar
