
Pharah - Members Area Guide
( FP's Overwatch Strategy Guide )

Pharah's Enemy Vs Ally Ultimate Comparison
VIDEOS: Specific places or positions where Pharah can use her ultimate Barrage at, along with places where she can use her Jump Jets for shortcuts:
~ VIDEOS COMING SOON! ~
| Payload | Point Capture | Hybrid | Control |
|---|---|---|---|
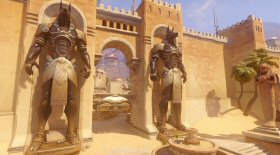
| Dorado | Hanamura | Hollywood | Illios |
| Route 66 | Temple of Anubis | King's Row | Lijiang Tower |
| Watchpoint Gibraltar | Volskaya Industries | Numbani | Nepal |
Pharah's Allied Synergies
Pharah's top support heroes:

1) Zenyatta: Zenyatta's Harmony Orb is very useful on Pharah. It is relatively easy for Zenyatta and Pharah to keep line of sight with each other because of the nature of Pharah's flying ability. Even if you need a quick heal from up above, Zenyatta can quickly throw his Harmony Orb on you to quickly heal you up.
Attacking enemies with a Discord Orb on them will almost feel like you have Quad damage on (like from the Quake games). Always pay attention to Zenyatta to make sure you keep your line of sight with him (if you have the Harmony Orb) and to also see what Zenyatta is shooting at, because 90% of the time the enemy Zenyatta is shooting it is the one that probably has the Discord Orb on. That should be a higher priority target for you.
Like Lucio's Sound Barrier, Zenyatta's Transcendence will enable Pharah to use Barrage without worrying about being shot down while using it. Transcendence can also enable Pharah to use Barrage while on the ground since Transcendence will act as a shield to block incoming shots from the enemy.
Pharah is weak against Roadhog and his Chain Hook, but Zenyatta is a great counter to Roadhog thanks to his Discord Orb and charged volley shots which can help fend away Roadhog from Chain Hooking Pharah in.

2) Lucio: Lucio's heal aura is very beneficial for Pharah and it can help keep you alive longer and you wont have to worry about obtaining health packs as much. Speed aura can be effective with Pharah as it will still work even while she is Jet Packing around in the air. When you are on the ground it can help you avoid enemies, and especially their ultimates. Keep in mind that Lucio's auras only work when you stay within 30 meters of each other and keep line of sight with him as well.
When you land on the ground from your jet pack ability, Lucio can protect you with his Soundwave ability by knocking enemies away from you, and this especially helps to keep Mei's frost stream, Reinhardt's Rocket Hammer swings, and other close up deadly attacks away from you.
Lucio's ultimate Sound Barrier is very powerful when combined with Barrage. Since Pharah becomes so vulnerable while using Barrage, the extra temporary shield from Lucio's Sound Barrier will ensure that Barrage will not get you killed in the process.

3) Mercy: Mercy works very well with Pharah. Her healing capabilities are simply the best amongst all the support heroes. Mercy can easily follow Pharah while jet packing around thanks to Mercy's Guardian Angel and Angelic Descent (air floating abilities).
Mercy's damage boosting is very effective with Pharah's rockets and Barrage as well.
The only negative aspect is that it can be a little dangerous for Mercy to follow Pharah around in the skies as she can be shot down by snipers or other long range damage dealers that have high long range accuracy. But Mercy is very versatile and can quickly come to Pharah's aid to heal her and then move onto another hero quite easily, thus reducing the risk.
Pharah greatly benefits from Mercy's Resurrect. Even though Pharah can use her Jump Jets to get back to the fight slightly faster, getting resurrected is still a huge time saver for Pharah, even more so than Symmetra's Teleporter.

4) Ana: With good aim, it can be easy for Ana to heal Pharah when she is flying around in the air with Biotic Rifle shots. It can be more effective for Ana to used scoped shots for instant hitscan bullets to land shots on Pharah when flying around.
Ana's Biotic Grenades can be difficult to land on Pharah when she is flying in the air and it is usually much easier to land a Biotic Grenade on Pharah when she falls back to the ground instead.
Pharah can use a Concussive Blast to knock enemies away from Ana if she is getting flanked, especially if Ana misses a Sleep Dart.
Pharah ranks okay at being a decent target for Ana's ultimate Nano Boost. Increased rocket damage and reduced damage while Pharah is flying around makes Nano Boosting Pharah a decent option for Ana.
Pharah's Barrage is normally very deadly, but she is also very vulnerable while using it. When Nano Boosted she can withstand more damage while casting Barrage while also ensuring enemies will die quicker as well, thus increasing the chance of her survival while Barraging. Although the main drawback with Nano Boosting Pharah's Barrage is that she cannot take advantage of the speed boost since she will still remain stationary while casting it.
Nano Boost does increase the speed of Pharah's flying abilities in the air.

5) Symmetra: Photon Shields from Symmetra can help you survive a bit longer and allow you to stay more aggressive and not worry as much about obtaining health packs.
You can lure enemies into Symmetra's Sentry Turrets by flying in the air and shooting rockets down below. The enemies will try to take cover from your rockets by going inside somewhere such as a room filled with Symmetra's Sentry Turrets.
And of course Symmetra's Teleporter will enable you to get back to the fight faster after dying.
Pharah's top tank synergies:

1) Zarya: Zarya's Projected Barrier is very useful on Pharah because it can help you survive while using Barrage or other times such as after getting chain hooked in by a Roadhog. Zarya can also use her personal Particle Barrier and then get in front of Pharah while she uses Barrage to further protect her by blocking incoming shots.
Zarya's ultimate Graviton Surge pairs well with Pharah's Barrage. The clumped up enemies in the surge is a great target for Barrage. Pharah still needs to be careful as enemies can still fight back while stuck in the surge, so having a Projected Barrier on or some other kind of protection during this time is ideal.

2) Reinhardt: Similar to Winston, Reinhardt can also provide Pharah with a shield to get behind, but only from the ground. From there, Pharah can safely fire rockets and use Barrage behind Reinhardt's shield. Another safe time to use Barrage is right after Reinhardt uses his ultimate Earthshatter to knock down a bunch of enemies, this can give Pharah a few seconds to safely use Barrage before they get back up.
Pharah can deal with some of Reinhardt's worst enemies, such as Symmetra's Photon Orbs against his shield and Junkrat's Grenade spam.
After Reinhardt charges at an enemy, he may be in a bad situation with many enemies surrounding him. You can help him survive by using a Concussive Blast to knock back enemies around him, giving Reinhardt some time to escape and get his shield out.

3) Winston: Winston's Barrier Projector (ground shield globes) can be a safe place for Pharah to be at when you are unable to fly in the air. Being under a Barrier Projector is a great time to use Barrage as you will be shielded from most of the attacks in the game, only Reinhardt's Fire Strikes or Symmetra's Photon Orbs will be able to penetrate through the barrier. The negative aspect of Barrier Projector is that it is ground based, so when you are in the air it will have virtually no protection for you.
If you see Winston being attacked close up by Mei's frost stream, McCree's Flashbang, Reaper's shotguns, Reinhardt's Rocket Hammer, or Zarya's Particle Beam, you can protect him with a Concussive Blast against these foes to knock them away from Winston.
After landing from a Jet Pack flight, Winston can activate his ultimate Primal Rage to protect you for awhile (by knocking enemies away from you) until you can Jet Pack again.

4) Roadhog: Roadhog is an independent tank that doesn't have many synergies with Pharah, although Roadhog's ultimate Whole Hog can scatter enemies around giving Pharah an easier time to pick off disoriented enemies from the knock backs of Whole Hog, and can also be an okay time to use Barrage as well.
Roadhog can Chain Hook and kill a lot of enemies that can give Pharah some problems, including Soldier 76, McCree, Hanzo, and D.va.

5) D.va: Before activating Barrage, D.va can quickly boost to your side and she can then use her Defense Matrix ability to protect you while Barraging. This generally only works though if you are standing on something.
D.va's Self-Destruct ultimate can act as a great crowd control for you, as you can easily pick off only a few enemies at once instead of being bombarded by a bunch at the same time.
Pharah also pairs well with:

1) Widowmaker: Widowmaker's Infra-Sight can let you see enemies before they come around a corner, enabling you to start firing rockets before they come within your line of sight, which happens to be very effective for Pharah. Infra-Sight also allows Pharah to scout the area out to see if it is safe to use a Jump Jet.
If Widowmaker is getting flanked, Pharah can use a Concussive Blast on the flanker to knock the enemy away from her.
Widowmaker is strong against many of Pharah's counters, including: McCree, Hanzo, Zenyatta, and Bastion.

2) Torbjorn: Torbjorn can give Pharah an Armor Pack which can increase your survivability, but remember that the extra armor from the packs cannot be healed and you would need to get a new Armor Pack to replenish the armor. When landing on the ground from a Jet Pack, look for an Armor Pack before jet packing again so you can survive more shots while hovering around in the air. The little extra armor could also help you survive while using Barrage.
Torbjorn's turret can provide Pharah with a safe area to fly around for extra protection. With this in mind, always be mindful where Torbjorn places his turret at, and try to keep line of sight with it for better protection. If you use Barrage, Torbjorn can activate Molten Core to further protect you while Barraging, it's not the best protection, but it can provide some support.
Torbjorn is strong against many of Pharah's counters, including: McCree, Roadhog, Zenyatta, and Genji.

3) Soldier 76: Soldier 76 can put down Biotic Fields, which can be an excellent place to gravitate to when you fall down from Jump Jetting. Unfortunately, Biotic Fields are not as effective with Pharah since you will be flying around most of the time and away from Soldier 76.
If Pharah uses Barrage at the same time Soldier 76 uses Tactical Visor, it's beneficial for Soldier 76 to focus fire on low hitpoint enemies that do decent medium to long range damage, so that both of the ultimates can remain successful.

4) Mei: Mei can freeze targets up close with her freeze blaster, or her ultimate Blizzard. This can give Pharah easy targets to shoot rockets at from afar.
Mei's Blizzard can freeze a lot of targets which can give Pharah a safe opportunity to use Barrage.
Mei can use her Ice Walls for crowd control against long range attackers to hold them back long enough for Pharah to do some safe Jump Jetting in the air.
Pharah's neutral synergies:

1) Junkrat: Junkrat's grenade spam is actually great crowd control for Pharah to fly more safely in the air. The enemies will tend to be more hesitant to push forward giving Pharah an easier time to survive in the air.
A trapped enemy from Junkrat's Steel Trap is a very easy target for Pharah to shoot at.
Sometimes it can be risky for Junkrat to do his Mine jumps around the map, but with Pharah flying in the air, she has his back since she will usually be able to fire at the same enemies that Junkrat jumps into.
When Junkrat uses his ultimate Rip-Tire, Pharah can distract the enemy from shooting the tire down by using a Concussive Blast on them, or even attempt to use Barrage at the same time which could increase the success rate for at least one of them succeeding.

2) Hanzo: Hanzo can use Sonic Arrows, which allows his allies to see enemies behind walls in a small radius. This allows Pharah to start firing rockets before an enemy comes around a corner. Pharah can also fire a Concussive Blast right before an enemy comes within view, giving them no time to respond to it. Sonic Arrows also allows Pharah to scout the area out to see if it is safe to use a Jump Jet.
Hanzo's Dragonstrike can make it a bit easier for Pharah to use a Jump Jet, due to the scattered enemies. A Dragonstrike can also make it a tad easier for Pharah to use Barrage (but there are better synergies out there for Barrage). Pharah can also use a Concussive Blast on an enemy to knock them into a Dragonstrike.

3) Bastion: Even though Bastion provides a nice DPS defense, he doesn't have much synergies with Pharah. Pharah can use a Concussive Blast against offensive flankers such as Genji, Tracer, and Reaper to fend them away from a Bastion Sentry.

4) Reaper: Reaper excels at taking out many of Pharah's counters, including: Bastion, Widowmaker, Hanzo, and Torbjorn. Removing those enemies from the battlefield can let Pharah safely fly in the air to do her dirty work.
It's usually not a good idea to use Barrage at the same time Reaper uses his ultimate Death Blossom, but you can attempt to use a Concussive Blast on an enemy to knock them into a Deathblossom.

5) Genji: Pharah can use her Concussive Blast to knock back enemies away from Genji that Deflect does not work on, such as Mei, Symmetra, and Winston.
Before Pharah activates Barrage, Genji can get right in front of her to use a Deflect to protect her while she is Barraging.

6) Tracer: Even though Tracer and Pharah have very little synergies together, they are both good at countering each other's counters.
Tracer is great against these heroes that Pharah has trouble with: Bastion, Widowmaker, Genji, Hanzo, and to a lesser degree, Zenyatta and Torbjorn.
While Pharah is great against these heroes that Tracer has trouble with: Mei and Junkrat.

7) McCree: While McCree uses his ultimate Deadeye, you can use a Concussive Blast on the enemy to disorient them from firing at McCree while revving up his Deadeye shots. Other than that there isn't much else the two can do together.

8) Pharah: Picking two Pharahs on a team is not a bad idea if the enemy's team is comprised mostly of short range attackers.
While one Pharah uses Barrage, the other one can use a Concussive Blast to disorient the enemy to prevent them from firing at the Barraging Pharah.
Members Area Menu:
Attack |
Defense |
Tank |
Support |
 Sombra
Free Guides Menu:
News/Home | Blog | Follow | Unlock Full Guide
Attack |
Defense |
Tank |
Support |
Map Guides
 Temple of Anubis
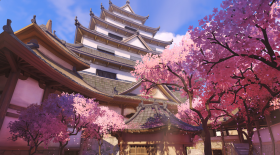 Hanamura
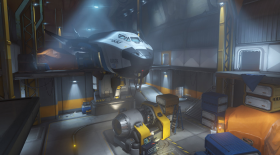 Watchpoint Gibraltar
Overwatch Hero Introductions - Basics Guide
How the Mechanics Work in Overwatch
How Headshots Work In Overwatch
Overwatch Game Modes Overview
Overwatch Health Types & Hitpoint Basics
Overwatch Terms, Abbreviations, & Their Meanings
Easiest and Hardest Overwatch Heroes to Master
My Hotkey
Bindings For Overwatch & Why I Use Them
|
Feel free to leave any type of comment, such as how you like the guide and if it helps you at all, or to report something that is inaccurate in the guide. |
